writer//Amy Namsiriwan
Iplehouse makes really beautiful dolls, but if you're like me and have need specific physiques for specific dolls, then you may want to hybrid their heads onto other bodies. However, Iplehouse dolls have large necks compared to the vast majority of bjds out there so there are very few, if any, bodies out there that that Iplehouse heads fit on without some sort of modification.
This is actually quite easy to do! Of course the method works for other hybridizations where the head hole is bigger than the neck.
You just need some clay, plastic wrap and an xacto knife or some other similar tool for shaping.
First cut 2 pieces of plastic wrap, one to cover the neck stump, one to fit in the head's neck hole:

Then take the clay, ball it up and then mold it into the neck hole:

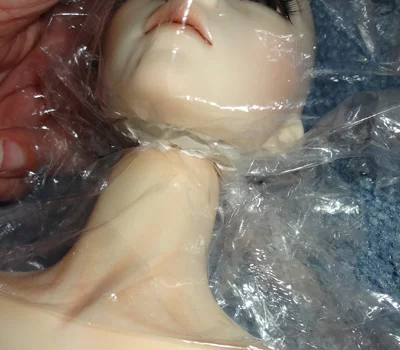
Now take the head with the clay in it and press it down on the plastic covered neck until the head looks like it's sitting the way you want it to. At this point, the clay will have squished out some and you may need to trim around the edges:
You'll see inside the head, when you pressed the clay, that the hole for the S-hook leaves a shape in the the piece:

That shape serves as a guide to show you where you need to cut the hole for the S-hook. Make sure to leave ample room. Carving the hole too big is generally not an issue, but if you make it too small then you'll have to carve hard clay out if your S-hook doesn't fit:

While cutting the hole out, the piece may have deformed some, so fit the piece in between the head and neck again to make sure that the shape is right. At this point you can smooth it out as much as you wish as well. The only part that will be showing is the lip of the underside of the piece, so it's not really necessary to make it all that pretty, but if you're a real stickler for details, even ones that can't be seen, knock yourself out!

Now you just let the clay dry, or boil or bake the clay, depending on what kind of clay you used. Sand or finish it any way you like if you wish. You can either use the clay piece itself, or if you like, you could get a small kit and cast the piece in resin. The clay seems to work just fine though. You can paint the lip that shows to match the doll's skin if you wish, but I find that mine isn't really seen much in pictures.
Even hardened clay is usually somewhat soft and still carvable with carving tools, so even if you find that your new piece needs some adjusting after it you thought it was finished, it can still be changed. Either carved out, or you could use a hot glue gun to add on, which I like to do since I trust the hot glue as sueding against the resin. Clay seems to hold pretty well against resin, but i still like glue.
The end!
Hope this helps some people!
Sorry for the rough example, but I'm doing this quickly and I'm not actually making a new piece for use since I already have one so I'm not going to take the time to make a fully finished smoothed out piece.
For other tutorials, visit Dirili's homepage: HERE


Donec id justo non metus auctor commodo ut quis enim. Mauris fringilla dolor vel condimentum imperdiet.