bjd

Getting Naked - baring it all behind the scenes

by Sharon Wright

Cat Hammond, over at The Doll Affinity, wrote a really fantastic post in response to my article about 12 Tips To Being a Better Photo Blogger.  In it, she talks about wanting to be more candid and pulling back the curtain a little to show some of the magic in the process of this hobby we love - photography. It really connected with me. I love watching behind the scenes videos and seeing other peoples' BTS photoshoots and whatnot - but I really haven't shared any of my own.

Since Cat sort of challenged others to do it, I thought I would kick it off and strip down to my bare bones. You'll see that I am not a perfect photographer, that most of the 'magic' actually happens in the editing room. 

To start off with, I shoot on a Canon T3i. It's not a super fancy camera, more of an older (discontinued) lower end pro-sumer style DSLR. I have a few different lenses but my lens of choice is my nifty fifty, 50mm. I shoot in full manual mode and usually manual focus as well. I prefer to shoot in RAW as that gives me the greatest flexibility to fix all my mistakes ;) I work in Adobe products for post processing. 

Now, I need to say this because it comes up all the time. It is not the camera that takes great pictures. Yes, it helps, but it is the skill and eye of the photographer and editor that makes it amazing. There are some pretty freaking jaw dropping images I've seen that were shot on a cellphone camera - so there are zero excuses. All the tools are available on the internet for you to learn any skill you want. That is how I taught myself. 

For this challenge, I tried to select a few different things to give you just a simple quick peek at my before & afters.  

Anyway - here goes... 

Brazen Beauty Natalia Fatalé - one of my all time favorite Integrity Toys ladies. She is from the 2013 convention (my first, and favorite, convention of theirs)
Dress by Ursi Sarna

Underexposed. She was shot deep in the shadows and since I didn't want to drop my shutter speed lower (to avoid blurriness from camera shake) I chose to take the darker shot at a faster shutter speed to get a crisper shot.  I knew, since I shoot in RAW, that I would have the ability to easily adjust the colors and contrast in post processing. I could have adjusted my ISO but I was, honestly, just being lazy. I fixed a few crazy hairs and added a bit more sun haze coming from the left side of the shot. 

Intrigue Elise Jolie by Integrity Toys, from the 2014 convention
Dress by Ginny Liezert

Same shoot, same day. This time I overexposed. Not on purpose. I snap a few shots as I'm making my adjustments in the camera. Sometimes the first couple pics end up being good and I want to save them, Again, since I shoot in RAW, I was able to fully adjust and play with the lighting in post. You'll notice that I also fixed a couple stray hairs and the gap in the petals on the dress too.

This shoot is one I did for Mombie & Son (Bo Bergemann and her son). It was an entire series of about 40 amazing, cinematic style images promoting their zombie bjds they featured at the 2015 SDCC. (Seriously, it's pretty damned cool. You can check the shots out HERE)

As you can tell I photoshopped some lights onto the vehicle to add a bit more realism to the 'moment' that was captured. I also adjusted the color levels to get a more creepy/greenish/horror feel to it and a bit more haze to give it a bit more 'tooth'. This was shot during the later half of golden hour and the effect of the sunlight in the hair and the movement in the dolls just really made these shots work so beautifully in creating that "movie moment" I was going for.
Without a doubt - one of the funnest and most creative shoots I've ever done!

Ginny, by Linda Macario. Coming very soon to JpopDolls

This one was really fun. Most people know me for being a mostly outdoor, natural light photographer. I don't do a whole lot of indoor diorama shoots - not that I don't enjoy them - I'm just not great at lighting them or working with flash effectively - but I'm trying to learn.  
I bought this fantastic bed set on Etsy from One Sixth Avenue, originally to use for my Naked Trooper series (absolutely NSFW). However, when I put glasses on Ginny she instantly came to life with this fantastic geekness to her and I knew she would have a bed set like that - and, like all teens, she'd have a really messy room.  
I got two really awesome paper lanterns (that actually lit up) in my 70's themed One Sixth Box a couple months ago and I had a desk lamp from the Dollar Tree that lit up. I used a few LED lamps placed just under the "TV" to give the effect that she was watching something and then placed a small lamp just to the right of the room on the other side of a velum paper window to give the illusion of maybe a street lamp or house light at night.
As you can tell, I did not adjust my white balance well so the original shot is very yellowish. No problem, I can easily adjust the colors when I bring the image in. I enhanced the lights to give them a bit more glow, adjusted shadows and selectively increased the exposure in some areas.
There are a lot of things I wish I still knew how to do better, but over all I'm pleased with how it turned out.

I never really put a lot of thought into showing my process, but after reading Cat's post I realized that I too love seeing the nakedness of other peoples work - so why not bare my own.

I will try to do posts showing my process more. And, if I don't - remind me and I'll make sure to get it done ;)

Oh - and for real - check out The Doll Affinity. Her 1:6 mini-me Cat is the best ever, and she does a dynamic job putting together some truly creative photo stories. 

We'd love to see your shots as well. Are you daring enough to get naked in front of your peers? Post them on our Facebook page under this link. 

To see more of my crap - a.k.a. - the stuff I do when I'm not working on STAND...
Facebook
Instagram
Flickr
All the NSFW stuff ;) 

12 Tips to Being a Better Photo Blogger

12 Tips to Being a Better Photo Blogger

Photo blogger and STAND editor-in-chief, Sharon Wright, lines out 12 keys to success 

Read More

Artist Rises To The Challenge For Kings Of Leon Album Cover

Renata Jansen, of Painting The Clouds, was given the opportunity of a lifetime. She was tasked with creating four portrait heads of the band Kings Of Leon.

We couldn't resist getting a bit of the back story and sharing it with you. In her own words she shares her experience.


One evening in June, just before bed I got an email from Kim Malone at The Dollery. It was so exciting that sleep was then definitely out of the picture! She asked me if I was interested in sculpting portrait heads of all four band members of the Kings Of Leon, the answer of course was YES!

Of course once the initial excitement wore off what was left was panic! I had less than a month to produce four portrait heads and I am definitely not known for my speed! When you have to do something though its amazing how you can find the ability and strength. I started from day one to mark each day off on the calendar to make sure that I finished in time as there are no extended deadlines when you are working towards an album release! I worked every day, all day and just made it, afterwards I slept for about 4 days!

I started by looking for photographs of each band member on the Internet. I was not lucky enough to work from life or photographs taken for the project as the band are very busy. The heads were built around a brass tube which runs from the top of the head to just under the chin. This made it possible to attach them to wooden dowels under the milk for the photoshoot.

I use a mix of Cernit and Fimo polymer clay, it creates relatively firm clay which is good for sculpting details on portrait work. Each head took 4 days to sculpt and another day to paint, extra days were also needed to make eyes and a skull armature for each head. I also needed to take photographs and film clips as I worked so that they could use them to make a short film about the making of the album cover. If you would like to see this it is on the Kings Of Leon face book page. Sometimes I almost forgot to take the photographs, I would get so into sculpting and suddenly realize it had been ages since I took a photo or film clip! I started leaving myself a note on my desk so that I saw it every time I looked up from my magnifier!

I made many pairs of blue eyes in order to find just 4 pairs that matched perfectly. I had to add eyelashes and make sure they would survive being splashed with water and milk. The paint I use is set with heat and is waterproof so that was thankfully not a problem. I didn't need to give them hair because only their faces would protrude from the milk for the photograph.

This was definitely the most challenging project of my career so far and also the one that taught me the most. It didn't always feel it at the time but its was a really wonderful experience which I was extremely lucky to have been a part of!


To see the sculpting process for each head - click the pics below. It's so facinating to watch them come to life!

Visit Renata to learn more about her work
Website
Facebook

Resin Yellowing - the Hows and Whys and What you can do about it.

If you collect resin dolls, eventually they all start to yellow. Whatever light they are in, whether it is direct sunlight, indirect light, indoor lighting or, hell, just age - they all have an effect on the pigment of the resin and all - sadly - turn various stages of yellow. As the color pigments in resin begin to break down and fade the one color that seemingly doesn't is yellow. Red pigments fade the fastest and every brand, color and type will all react differently and fade at different rates. 

There is no way to avoid yellowing, it is a natural occurrence in the resin BUT there are ways to slow it down

The main way is to avoid sunlight. That doesn't mean you can't take your dolls outside for photoshoots (I'd be completely screwed if I couldn't play outside with my dolls!) Just don't leave them sitting around outside in the sun for hours or days. A small amount of sunlight is not going to immediately damage your dolls. Go play dammit, just do it smart!

Use a UV resistant sealant. There are a number of really great ones on the market, Mr Super Clear is probably the best known but ask around, there are new products out that I'm not familiar with - check with your favorite faceup artist, they will usually know what works best. Sealants can yellow, btw. That is easily fixable with a quick wipe and new faceup but the resin itself won't yellow.

Lots of other ways you can try to slow the yellowing process is to keep them in a room with the curtains drawn, you could dress them in clothing that completely covers them (though some dark clothes stain certain resins...), keep them all hidden away from everything and everyone in sealed boxes where nobody will ever see them (really, whats the point of having them then if you can't enjoy them?)

Oh - and keep them away from cigarette smoke. Just like your teeth, resin will absorb it and turn yellow too.

Look, yellowing is natural and inevitable - that doesn't mean you shouldn't enjoy your dolls. They are meant to be played with, customized, looked at, photographed and redressed. THAT is why you got into bjds to begin with, right?

Okay - SO - you have a doll that is yellowing what can you do?

WELL - funny you should ask. There are a few different options.

The sure fire way - you can sand off the yellowed resin with a high grit paper to remove the top layer and expose the original color.

The other way - paint it or dye it.  Read how to below.

(Note - the post below is copied from Den Of Angles. I have tried to locate the original author to ask permission to share this but have been unsuccessful. I think it's really valuable information and encourage you all to please visit the original post to read about others results and modifications. There is some really fantastic advice from a number of members and lots of comparison pics too.)

Author - Cymorill (DoA)
 

De-zombification Serum: Resin Color Restoration

I've posted a few experimental restoration threads in the past for mildly yellowed and mellowed resin, but I've finally perfected it in an easy-to-use method! This works for both sanded and unsanded parts! Please be aware that each part must be either unsanded (like hands and feet) or completely sanded if the seam lines have been removed to give an even tone! This method uses a special mixture of RIT dye to restore the red tones to resin that has faded and taken on that "zombie" hue.

Supplies:
1 bottle each of liquid (not powder) RIT dye according to the below formula
1 small glass bottle
1 eyedropper (or bottle with eyedropper top)
Water
Pan
Stove

To make "De-Zombification Serum" :
(Since the colors supplied by your local craft or fabric store can vary, I'll list a few different serum formulas)
Formula #1: Mix 1 part Scarlet Red, 2 parts Golden Yellow, and 3 parts Petal Pink in the small glass bottle. Close and shake until blended.
Formula #2: Mix 4 parts Rose Pink, 1 part Tan.

*Note: But my doll is already yellow! Why add yellow or tan dye? Because straight out red dye makes a doll look sunburned. The yellow tones in the resin also break down, but not to the extent that the red does and not as quickly. This mixture provides a flesh color, not that freshly-spanked-bottom blush.
**Another note: Interestingly, this serum looks like fresh blood. 

To use "De-Zombification Serum" :
** Make certain all doll parts are clean and free of MSC, blush and paint **
1. Measure out enough water to cover your doll parts and pour it into the pan.
2. Heat water to just under a boil (when it starts to get bubbles on the bottom but is not actively boiling)
3. Using the eyedropper, add 3 drops serum for every 1 cup of water and stir well.
4. Begin with a test piece. This should be an arm or leg piece, something smooth and easy to sand if it's left in the dye bath too long.
5. Submerge test piece in dye bath. Remove after 30 second and rinse thoroughly to check color. If the color is still too light, repeat until desired flesh tone is achieved. This will be your total soaking time! Soaking times will vary for each doll due to resin type and degree of yellowing. The time does not vary for sanded vs. unsanded parts of the same doll.
6. Submerge remaining doll parts in the bath, allowing them to soak for the established soaking time, stirring occasionally.
7. Remove pieces and rinse thoroughly in running water. Dry, and allow to cool.
8. If the color on a single piece is too dark or uneven (due to poor sanding) wipe the part with nailpolish remover and a cotton ball while the part is still warm. This will remove a little of the dye.
9. If your doll is too large or your pan is too small to soak all the parts at once, that's okay. BUT you must make a new bath for each batch of parts, as subsiquent batches will be lighter as the dye is used up. Dye time will be the same for each batch of the same doll.

That's it! This same method can also be used to color match hybrid parts.
The De-Zombification Serum can be saved and used again later. As with any dye project, be certain to observe the usual precautions. Careful not to get any of the serum on your hands or you might transfer it to you resinoyd and stain it.

Example: To restore a very faded Luts Kid Delf, I soak the parts for 1 1/2 minutes. To color match a very faded Kid Delf to a Minifee head, I soaked the body for 4 1/2 minutes.

Some comparison pictures
Non-sanded parts:

Sanded parts:

Do you have any tips or a solution that works for you - be sure to share it below so that others can benefit from your experiences. I'm still fairly new to all of this so I'm genuinely interested in learning! 

This Super Amazing Handy Dandy Scale Converter Will Save Your Sanity!

If you hate to math - like me - then this will change everything!

I was trying to make a newspaper today as a prop for a shot I'm working on and wanted to scale it down to 1:6 size. Well, I'm HORRIBLE at math, seriously, I can't math at all. That is when I stumbled upon this little gem...

SCALE CONVERSION CALCULATOR

If you ever want to scale something up or down - this will save you time and headaches!!!

Check it out and bookmark it for future use!

The Value of Integrity - Tips From One Artist to Another

by Tracy Promber
Facebook Group
JPopDolls


With so many new, and talented artists coming out, I thought I would pass along some useful tips that were once offered to me when i entered the world of dolls. Maybe this will be helpful to some, maybe not. You can love it or leave it. It's up to you, but it's worked for me.

Be an ORIGINAL. With copyright and recasting issues rearing its ugly head more and more, don't be the person who gets accused of copying another artists work. That is a big unwritten no-no. While there is only so many ways you can re-invent the wheel, don't blatantly "emulate" another's work for resale. It's just flat out wrong.

No, it's not flattering to see something that took you a very long time to design, and put together, remade by someone else a week after you put your work out for the world to see. Be it sculpting, painting, sewing, etc, things inevitably can end up similar to someone else's work but, please, put your own spin on things. Make your work unique to you. Be an individual who shines on their own. I promise you, you will be admired that much more for it, plus it just feels good being able to create something that came from your heart. Not to mention that you may find yourself infringing on copyright, which can carry some stiff penalties.  And on that note, get your work registered with the copyright office too.

Be SUPPORTIVE. I am very fortunate to have a close group of friends in the doll world. They are a second family to me. We always support each other, whether it is personal or work related, I know without a doubt they will be there. Being able to run ideas past each other, or gather input on current works in progress is fantastic! It's just nice to share with them, and have that sounding board of feedback when needed whether it's good or bad. We all in this industry should support new artists and help guide them to be great. There is so much talent out there that should be nurtured instead of put down out of jealousy.

Dedication. The doll world is such a large and diverse area. There is a lot of room to spread your creative wings so to speak. Don't be afraid to try new things. Put your self out there. Challenge yourself with new projects. Most importantly, don't give up! Stay focused on your goals. Sometimes walking away from a tough project for a few days does the trick for me.  Especially when starting again with fresh eyes. If at first you don't succeed, try it another way. Some of my best creations were trial and error over and over, until I got it right. I've also had many a project make its way into the trash bin too. Don't get frustrated. We all have "those" projects. Just don't quit.

Stay humble and be thankful for the opportunities that come your way. Don't complain. Especially online. If things don't go your way, try again. Your day will come. People get turned off by excessive whining. We all have our own struggles, and sooner or later they always work out.  Be conscious of what you post online.  What is aggravating today and led you to a big Facebook ranting, will probably not seem like that big of a deal tomorrow, making you regret having posted it in the first place. The doll world is not the place to try to gain a sale out of sympathy or anger. If people like what you create, they will seek it. Don't guilt people into buying your stuff.

Being recognized for your accomplishments. Again, be humble and thankful. I've been fortunate enough to win numerous awards for my work. The awards that mean the most to me are the ones that my customers and peers voted towards. It is very gratifying to know that my work has touched people the way the Iintended it to. If it gives someone joy, it's all worth it to me. This is why I do it. Having the ability to create is definitely a blessing, and I am thankful for it every day.  Having been given a GENUINE award is a phenomenal feeling. Always remember this is a business. One award does not a master make though. Keep up the good work. Keep building and honing your skill. It all will pay off in the end.


Integrity is really everything, and it's an easy thing to have and maintain. Just remember:

Don't get caught up in drama.
Stay focused on your originality.
Keep your head screwed on straight.
Keep your moral compass in check. 
Stay honest and humble.
Don't be afraid to explore new ideas.
Don't step on other artists toes
Do ask for help when you need it.

The doll world should be a fun and exciting place. Let's all do our part to keep it that way

This is all advice that has been gathered and taken to heart over the years. No one is perfect or exempt from screwing up. We all do it. Everyone is expected to make mistakes here and there. That's how we learn right?

Collectible, OOAK, or Artist Dolls - oh my! Award Confusion Abounds

I have been looking at the Public Choice awards/Dolls Awards of Excellence Awards that DOLLS magazine does.  I have to admit this confuses the heck out of me. It actually always has but when I was working for them (Jones Publishing) I didn't want to admit I was a complete idiot when it came to the wide world of dolls. 

But, now I am.

For the awards, there are Collectible Doll categories, Artist Doll categories and OOAK doll categories. (There are also faceup, fashion, baby dolls and reborns.) 

The Artist dolls are all ball jointed dolls, I am guessing they are all one-offs of various existing/upcoming dolls done by the artist, right? That is what it looks like. That one is fairly easy.

The OOAK category is where it gets really confusing. dolls are all over the board in that category. The OOAK Fantasy Themed dolls are all figures. The OOAK Less than $1250 and Over $1250 are all figures except for one bjd and a baby doll. Were those mistaken placements? I guess not, since one (or more) was an Award of Excellence winner in that category.
(note - I'm not discounting the winners, stay with me here...)

Looking at the entries, some of the Artist Dolls are also OOAK so I'm not sure what the distinction is between an artist doll and a OOAK.

THEN, if it's not confusing enough, there is the Collectible Doll categories. Okay wait...aren't they all collectible?  

It's kind of all over the board, some of them are OOAK and some were pre-orders...and one is a statue. And wouldn't most of these fit into the other categories, or vice versa, so why the different category? And what is the difference between an Artist doll and a Collectible doll? 

AAAAGGGGHHHH!!!!!!!

Seriously. Do you see my conundrum? How do you even judge this? 

I always thought what classified something as a doll was that it was poseable in some way. The head turns, the arms move, etc. I understand many dolls are mainly for display, but they are still meant to be interactive in some fashion.

Then there are figures. We have collected quite a few of them. A 'figure/figurine/statue' is created in a particular pose and, many times, affixed to a base. It is not meant to be played with, modified, or even redressed. Really, it's only purpose is to be looked at.  

Then - you come to art dolls - which, apparently, which don't have to conform to a damn thing, which is where a lot of the confusion all comes from, Is it a doll or a figure? WTF?!?! And why does it get to be whatever the hell it wants? 

Confused yet? 

Shouldn't there just be a figure/art doll category? Because, really, it's a nightmare to even try to judge this. How do you compare an engineered, functional bjd next to a filmmaker Santa figure? Or a Don Quijote figure with a baby doll. Was the baby sculpted? or from a kit? Because that would make a big difference, right? Do you get what I'm saying? 

Now, don't get me wrong, I greatly appreciate the talent and skill it takes to create all of these, and they are all wonderful. That part is not up for debate. I'm only bringing up the category choices because it's confusing as hell and I wonder if it is as confusing to everyone else.

With all that being said - I highly encourage everyone to go check it all out and cast your vote. Support the artists that work so hard to create the treasures we love. You'll find all the info in the latest issue of DOLLS mag and Haute Doll mag - they were both the same issue this time.

Leave your thoughts, I am genuinely interested. 

When the standard just doesn't fit - you break it. Pasha Setrova is changing the jointing game

Pasha Setrova is a Russian born artist, currently living in New York, who's work has been seen on MTV, Bazaar, Cosmopolitan, Tatler, Fashion Collection, Time Out, Grazia, InStyle, Hello!, Fashion Report, Fashion Collection, OK!, Moscow Where, L’Etoile, Profashion, L’Officiel, People, Russian Chicago, WTF?, Snob, Tape, and many others.

Her sculptures are amazingly full of wonderment. I am a tremendous fan of her art! Trust me, just take a look at her site and see it all - just wow.

Westwood - Choose Well

Saintly Sinners

Lollipop Art

Dirty Whisper

So, when I see that she is creating a doll - well - STOP EVERYTHING AND LOOK!  

I'm not the traditional collector, dolls are mostly the muses for my photography, so obviously I am a big lover of all things jointed, the more jointed the better as it means more natural posing abilities. 

As I was falling down the rabbit hole online one night, I saw it. The first thing I noticed was the shoulders. I literally think my jaw dropped. 

Now, I'll admit my knowledge of bjds is fairly small compared to the totality of the world out there. There are a gazillion artists creating a wide array of styles but I, personally, have yet to see one with jointed shoulders. 

I had to talk to her and find out more! 

S: I had to reach out to you and find out more about this doll you are creating. Tell me more. Is this your first doll? 

P: I had it in my head to make a ball jointed doll for a long time already but from the beginning I wanted her to be unique - different from all others and very articulated.
About a year ago I finally decided to start my long awaited project and prepared for a lengthy process. I've been a figurative sculpture for some time now, but I hadn't had any experience with ball joint dolls before. To be honest, I hadn't even held one before! But since I wanted to make her different I tried to think about my lack of experience as an advantage. Things standardly seen in the industry like immobile set shoulders and square elbows/knees were not engrained in my mind.
And so I built her from the joints up – in particular the shoulder joints. As a former model I know most poses, if they are not static, involve the shoulders and I knew that if I could just create shoulder joints that could properly mirror those motions, my doll would already be unique. Because as of yet, I have not seen any other ball jointed doll with naturally articulating shoulders - that not only move up, but also forward. While it may seem very simple but to come up with these simple looking shoulders, I went through 5 drastically different prototypes. And when I finally did find the shape I was looking for, it was just the beginning of a dozen more prints with a dozen more adjustments.
I am also proud of the knees and elbows. Most bjd dolls have these square knees and elbows when fully bent . I strove to keep mine natural looking not only when they were straightened but also when bent. I worked everyday for the past year and eventually I think I went through about 57 different bodies. Maybe more.
S: I believe it. I am just in love with her already! So, what are the next steps for you and your doll?
P: I am finally so close to finishing her. A couple of last minute adjustments left before I will send her off to a mold maker to be casted and then she will debut on a moderately exclusive scale. So here I am and here's my new PashaPasha doll. She's not a toy and yet she is a toy. You can play with her, change her wigs, her eyes, her clothes. You can pose her and just admire her. She can make the most perfect poses. She is perfect to me.

To connect with Pasha
Facebook
Instagram
Website

EXCLUSIVE Tutorial by UNNIEdolls

UNNIEdolls gives us the first look at her newest tutorial. An adorable off shoulder blouse with easy to follow directions. ENJOY!

I created this pattern maybe a year ago. Many of you have been interested how I make the off shoulder blouses for my dolls. So, here is a tutorial, where I show you the whole process. If you make a blouse by using my pattern, please share with me on facebook, instagram, flickr, deviantart by using this hashtag #sewingwithunnie

HUNGARIAN SUBTITLE is available!

if you have any questions, please ask!:)

♥ Webpage/blog/shop: http://unniedolls.com
♥ Etsy Shop: http://unniedolls.etsy.com

My social sites:
♥ Instagram: https://www.instagram.com/unniedolls
♥ Google+: https://plus.google.com/+unniedolls1
♥ VK: http://vk.com/unniedolls

♥ Facebook: http://www.facebook.com/UNNiEDOLLS
♥ Tumblr: http://unniedolls.tumblr.com
 

The Editors Shoot - Ginny by Linda Macario

Man, This is when I love my job the most, when I get a chance to play with something brand new! I adore my collection but the thrill of taking a new doll out of the box and discovering it's 'voice' is what drives my creative juices. And, when it's a doll that isn't quite available to the public yet - well it makes it just that much more special. 

Ginny, by Linda Macario, stands 17.7 inches and is coming very soon to Jpopdolls.net

I shot her in various wigs and styles but you can really tell when I fell in love with her. As soon as I popped that gorgeous shoulder length straight red on her it was instantaneous. She really sprang to life and I became quite inspired as her personality began to develop. She is adorable in frills and bows but, for me, I love her with a slightly geeky style.

Visit Jpopdolls.net to learn more about Ginny. (I should also mention that all the wigs are from Jpop too - they do some seriously fantastic wigs!!!) 

Lashing Out Loud - Replacing those pesky eyelashes the easy way

Laurie Lenz, one of the jaw dropping repaint talents in the group The Repaint Society, has provided us with us awesome tutorial on eyelashes. 

I know that the majority of my ladies get crushed or missing eyelashes at one point or another - the downside to actually playing with my toys. Thankfully, it's not that hard to replace them and here's how:

What you need:

*Eyelashes...preferably a strip without glue on it. (Dollmore, or Volks sell them.)

*Aleene's Quik Dry Tacky Glue
(I recommend the Quik Dry, or you'll be waiting for FOREVER.)
(Never EVER EVER use Crazy Glue! It's from the devil.)

*Angled tweezers

*Angled scissors (that little piece of yarn is there to warn my family--"touch & die.")

*Toothpicks

*Damp Cotton Swab (not pictured.)


Hold your eyelash strip up to the doll's eye to get a rough estimate of how much you'll need.

Cut the section off the strip and gently roll your lash around a pencil to give it some curl.

Take the Quik Dry Tacky Glue and apply it to a toothpick.

(This is a water based glue.  If you ever want to remove the lashes, just wet a Qtip and dab on the lashes and they will come off. Never use any glue but a water based glue. )

Dot dot dot the glue from her tear duct to the center of her eye. (Do not go past the center.)

Apply tacky glue to half of the eyelash.

See that Q-tip? I always have a damp one there just in case I get some glue on my doll

so I can quickly wipe it off.

Allow to sit for a few seconds and then with your angled tweezers, place the lash against the eyelid -glue to glue.

With a clean toothpick, gently press the lash into place.

Go make a sandwich, waste time on Facebook, place a bid on a doll, or move your wash to the dryer, and allow the glue to dry.

Once the glue has set, press the eyelash down, so you can judge where it needs to end.

Pull the lash up gently, and cut to fit.

Pull the lash back and run a bead of glue on her upper lid, 

and run a bead of glue on the back of her eyelash.

With the clean toothpick, press down and position.

Allow the spider lady's eyes to dry.

Once they are dry, take your angled scissors and trim the lashes.

From ordinary to extraordinary. Love those lashes, Daphne!
Special thanks to Laurie Lenz for this tutorial. She the original below and check out all her other amazing work - seriously, check it out! 

http://etsylaurielenzangels.blogspot.com/2014/07/lashing-out-eyelash-tutorial.html

Modifying Heads For Hybrid Dolls - An Easy Solution

writer//Amy Namsiriwan

Iplehouse makes really beautiful dolls, but if you're like me and have need specific physiques for specific dolls, then you may want to hybrid their heads onto other bodies. However, Iplehouse dolls have large necks compared to the vast majority of bjds out there so there are very few, if any, bodies out there that that Iplehouse heads fit on without some sort of modification.

This is actually quite easy to do! Of course the method works for other hybridizations where the head hole is bigger than the neck.

You just need some clay, plastic wrap and an xacto knife or some other similar tool for shaping.

First cut 2 pieces of plastic wrap, one to cover the neck stump, one to fit in the head's neck hole:

Then take the clay, ball it up and then mold it into the neck hole:

Now take the head with the clay in it and press it down on the plastic covered neck until the head looks like it's sitting the way you want it to. At this point, the clay will have squished out some and you may need to trim around the edges:

You'll see inside the head, when you pressed the clay, that the hole for the S-hook leaves a shape in the the piece:

That shape serves as a guide to show you where you need to cut the hole for the S-hook. Make sure to leave ample room. Carving the hole too big is generally not an issue, but if you make it too small then you'll have to carve hard clay out if your S-hook doesn't fit:

While cutting the hole out, the piece may have deformed some, so fit the piece in between the head and neck again to make sure that the shape is right. At this point you can smooth it out as much as you wish as well. The only part that will be showing is the lip of the underside of the piece, so it's not really necessary to make it all that pretty, but if you're a real stickler for details, even ones that can't be seen, knock yourself out!

Now you just let the clay dry, or boil or bake the clay, depending on what kind of clay you used. Sand or finish it any way you like if you wish. You can either use the clay piece itself, or if you like, you could get a small kit and cast the piece in resin. The clay seems to work just fine though. You can paint the lip that shows to match the doll's skin if you wish, but I find that mine isn't really seen much in pictures.

Even hardened clay is usually somewhat soft and still carvable with carving tools, so even if you find that your new piece needs some adjusting after it you thought it was finished, it can still be changed. Either carved out, or you could use a hot glue gun to add on, which I like to do since I trust the hot glue as sueding against the resin. Clay seems to hold pretty well against resin, but i still like glue.

The end!

Hope this helps some people!

Sorry for the rough example, but I'm doing this quickly and I'm not actually making a new piece for use since I already have one so I'm not going to take the time to make a fully finished smoothed out piece.

For other tutorials, visit Dirili's homepage: HERE 

Turn your boring pieces of furniture into vintage shabby chic awesome

I simply adore anything that has character, so when I saw this tutorial by Unniedolls I knew I had to share it! 

Not only is it super easy but it looks fantastic. Think of all those bare wood items at Michaels that you could spruce up - oh, and don't forget to download their app too to save extra $$$ ;)

Be sure to check out Unniedolls here:
♥ Webpage/blog: http://unniedolls.com
♥ Etsy Shop: http://unniedolls.etsy.com

Making a custom wig - Not as hard as I imagined

I found this fantastic tutorial today and was mesmerized watching her. I'm sharing part 2 which is about placing the hair on the wig, I think making the cap is probably fairly simple and I'll leave it to you to go to her site and watch that one.  I really just wanted you all to see that it isn't as hard as you might think to make your own.

Of course, I probably never will as I'd prefer to pay someone else to do it, lol...BUT if I got crafty (though my crafting skills are really limited) I actually think I could pull this off. So who knows, maybe I'll get industrious one day and give it a shot ;)

Give this a watch and check out Unniedolls website for more. She does some fantastic mods and repaints.

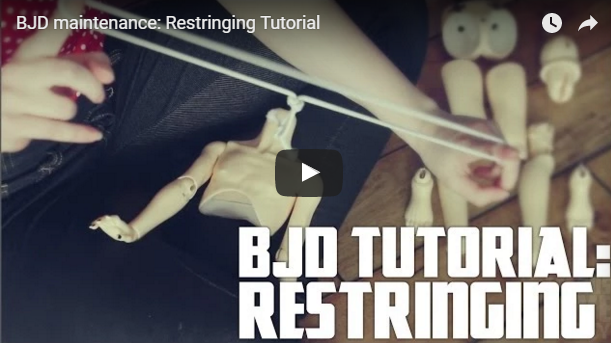
Restringing tutorial - bjd or fashion bjd, it must be done occasionally - here's how

Icarus Love Melody does a fantastic job of showing us how to restring. Many of us have dolls that get kicky (too tight) or floppy and lazy (too loose) - and Lord knows, I'm the only lazy bitch allowed around here!  

This looks way more simple that I thought it was. Maybe a few of my dolls will get tightened up a bit now.  

Hmm, can someone please come pull my strings and tighten me back up too? ;)

Restringing is always a daunting task in the beginning, I had friends walk me through it when my first doll required some upkeep and now I hope I can help you~ This is a quick and simple run down of how to restring a BJD; some dolls have different internal structures so this system won't work for everyone but will give at least the basics for those who want to give it a try.