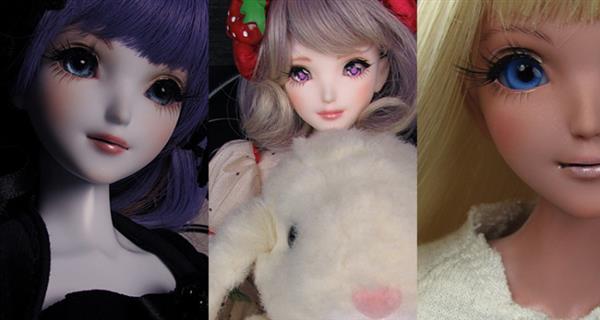
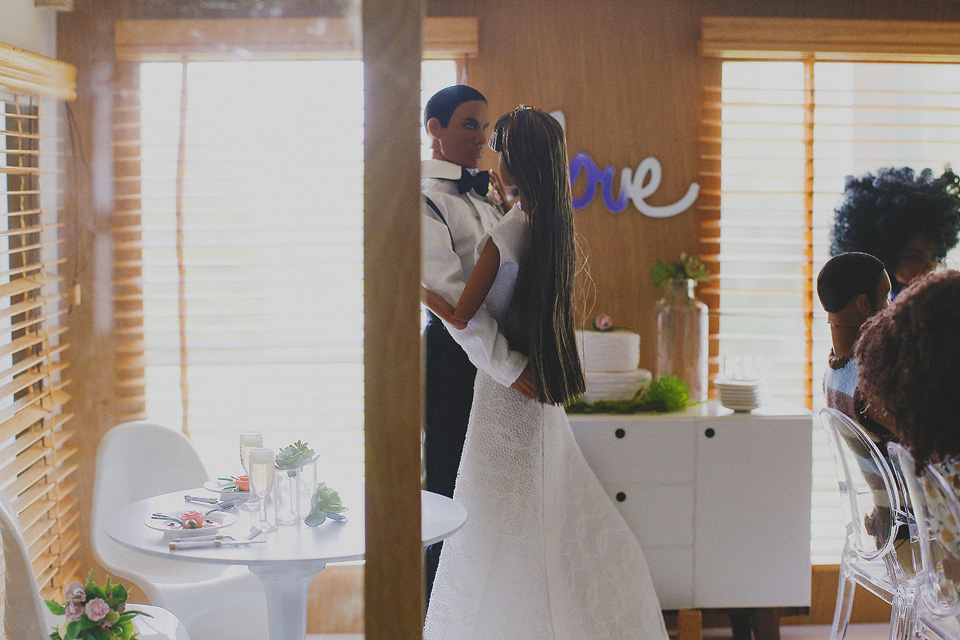
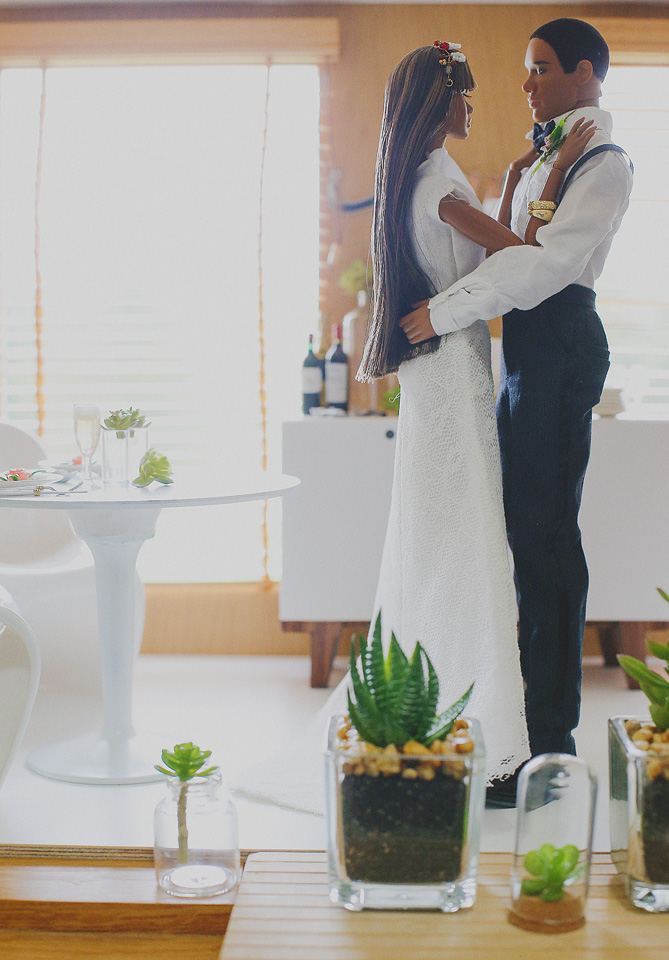
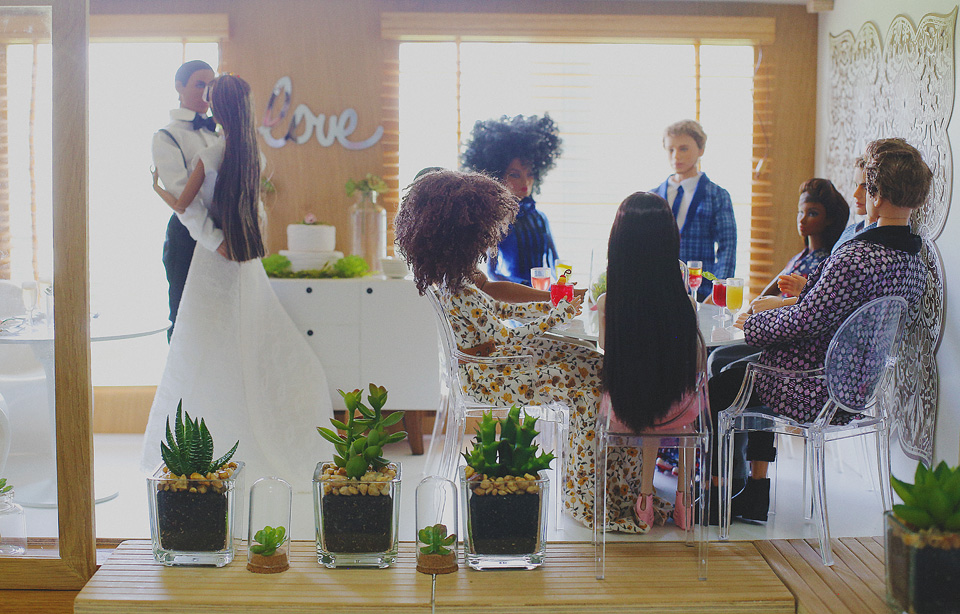
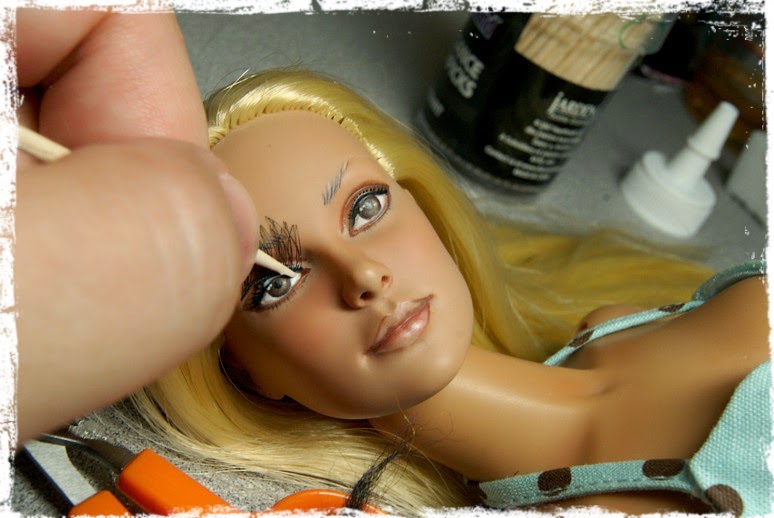
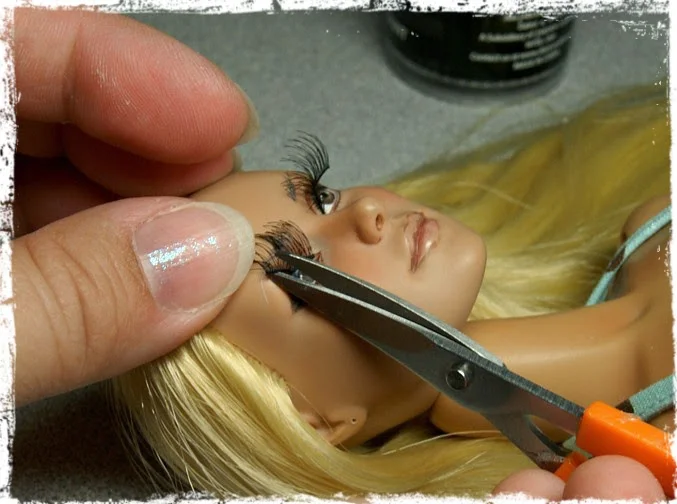
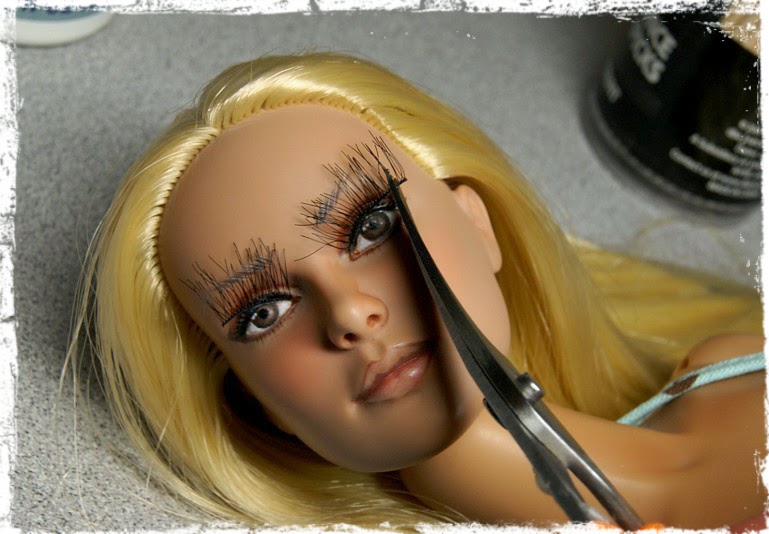
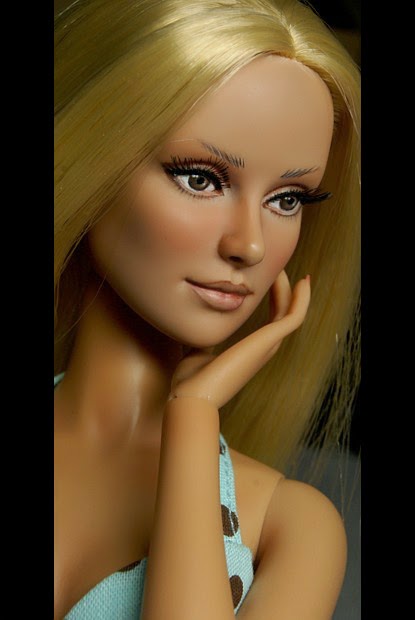
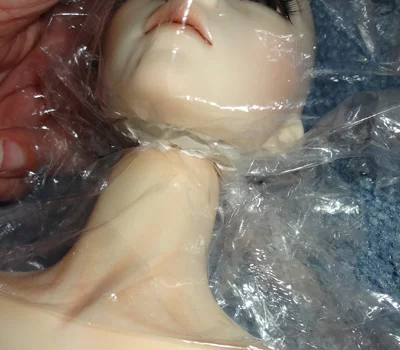
doll

Oldie but a Goodie - LV for Dolls - I see some familiar faces!

This was shared on social media and it's one I hadn't seen before - so I assume many of you haven't either - so enjoy!

Fashion dolls have been a central inspiration for Fabrizio Viti, Louis Vuitton's shoe style director. They stimulate his imagination just as art, photography and old movies. He has been collecting dolls since he was three years old and as a result, today he has a collection with around 500 pieces.
A brand of rich history and infinite creativity


When the standard just doesn't fit - you break it. Pasha Setrova is changing the jointing game

Pasha Setrova is a Russian born artist, currently living in New York, who's work has been seen on MTV, Bazaar, Cosmopolitan, Tatler, Fashion Collection, Time Out, Grazia, InStyle, Hello!, Fashion Report, Fashion Collection, OK!, Moscow Where, L’Etoile, Profashion, L’Officiel, People, Russian Chicago, WTF?, Snob, Tape, and many others.

Her sculptures are amazingly full of wonderment. I am a tremendous fan of her art! Trust me, just take a look at her site and see it all - just wow.

Westwood - Choose Well

Saintly Sinners

Lollipop Art

Dirty Whisper

So, when I see that she is creating a doll - well - STOP EVERYTHING AND LOOK!  

I'm not the traditional collector, dolls are mostly the muses for my photography, so obviously I am a big lover of all things jointed, the more jointed the better as it means more natural posing abilities. 

As I was falling down the rabbit hole online one night, I saw it. The first thing I noticed was the shoulders. I literally think my jaw dropped. 

Now, I'll admit my knowledge of bjds is fairly small compared to the totality of the world out there. There are a gazillion artists creating a wide array of styles but I, personally, have yet to see one with jointed shoulders. 

I had to talk to her and find out more! 

S: I had to reach out to you and find out more about this doll you are creating. Tell me more. Is this your first doll? 

P: I had it in my head to make a ball jointed doll for a long time already but from the beginning I wanted her to be unique - different from all others and very articulated.
About a year ago I finally decided to start my long awaited project and prepared for a lengthy process. I've been a figurative sculpture for some time now, but I hadn't had any experience with ball joint dolls before. To be honest, I hadn't even held one before! But since I wanted to make her different I tried to think about my lack of experience as an advantage. Things standardly seen in the industry like immobile set shoulders and square elbows/knees were not engrained in my mind.
And so I built her from the joints up – in particular the shoulder joints. As a former model I know most poses, if they are not static, involve the shoulders and I knew that if I could just create shoulder joints that could properly mirror those motions, my doll would already be unique. Because as of yet, I have not seen any other ball jointed doll with naturally articulating shoulders - that not only move up, but also forward. While it may seem very simple but to come up with these simple looking shoulders, I went through 5 drastically different prototypes. And when I finally did find the shape I was looking for, it was just the beginning of a dozen more prints with a dozen more adjustments.
I am also proud of the knees and elbows. Most bjd dolls have these square knees and elbows when fully bent . I strove to keep mine natural looking not only when they were straightened but also when bent. I worked everyday for the past year and eventually I think I went through about 57 different bodies. Maybe more.
S: I believe it. I am just in love with her already! So, what are the next steps for you and your doll?
P: I am finally so close to finishing her. A couple of last minute adjustments left before I will send her off to a mold maker to be casted and then she will debut on a moderately exclusive scale. So here I am and here's my new PashaPasha doll. She's not a toy and yet she is a toy. You can play with her, change her wigs, her eyes, her clothes. You can pose her and just admire her. She can make the most perfect poses. She is perfect to me.

To connect with Pasha
Facebook
Instagram
Website

This wedding series is so good, you will forget they are dolls

Nesha Kaye produced one of the finest photo series I've seen portraying a wedding. From the engagement photos all the way to the reception - it was impeccable. 

Her attention to detail is second to none, as many of you know. (Nesha has developed quite the following on her Instagram and Flickr) I just couldn't resist asking her about it and bringing you a sample of some of the shots. 

S: Ok, I just HAVE to know what inspired this?

N: Last holiday season, I decided to do a series of romantic, photo stories for a few of my dolls on Instagram.  The climax to the series of stories, were my favorite doll couple-Harmony and Jackson getting engaged on Christmas Eve. To be honest I thought the story would be finished but I kept being asked about the wedding so after much back and forth, I caved in and set the date for May 15, 2016 (my 18
th wedding anniversary).

S: I've seen many people do the whole wedding series before, but never as clean and real as yours. How did you decide on the theme?

N: I wanted the wedding to be as realistic as possible so I started with engagement photos, followed by the bride and groom getting dressed, and formal wedding portraits. The wedding itself was by far the hardest part but after searching through Pinterest for inspiration and consulting back and forth with my Mom, I was able to create my version of an Idyllic Floral Wedding.

S: Where did you find all the accessories and decorations?

N: Amy Sprouse of “TinyRibbonThings” on Etsy created the bouquet, boutonniere, and wedding cake from a Pinterest design and I made or sourced all the floral arrangements and decorations. For the reception I wanted simple elegance and a softer, more romantic feel so I kept all the décor and furniture to a minimum. To keep it fun and light, I used quotes for each image. Everything was shot in 1:6 scale, using various room boxes and furnishings from my personal collection.

S: This was a ton of work! How many images is the complete project and is there a chance you'll do it again?

N: The pre-wedding, wedding, formal portraits and reception took me 6 weeks to create and 80 images to bring to life.  I’m really happy with the result and look forward to creating another wedding sometime next year.

S: Nesha, thanks so much for sharing your work with STAND. I can't wait to see what you do next!

You can see some of her work featured in Volume 2 of the STAND Lookbook coming July 5th. Until then, see the entire shoot and all of her work on her social media sites:

Facebook
Flickr
Instagram

For those who like cute girls with wires sticking out of them - Smart Doll to the rescue

Danny Choo turned heads last year when he introduced his line of Smart Dolls, first modeled off the mascot of Culture Japan, Mirai Suenaga.

These dolls fuse Japanese ball-jointed craftsmanship with useful functions like the ability to hold game controllers and other objects up to 700 grams (about 1.5 pounds), to tell time, and, now with his latest addition to the series, She can do even more.

Whether it's charging your mobile accessories, connecting an external hard drive, maybe even hold an external web cam, she can do it all with a built-in USB hub. 

For folks who face first world problems like the USB sockets being on the backside of an iMac, you can now easily gain access to USB ports via Smart Doll USB Hub

For folks who face first world problems like the USB sockets being on the backside of an iMac, you can now easily gain access to USB ports via Smart Doll USB Hub

The female torso option has two conveniently located USB slots for all your gadgets.

But for those of you concerned that Choo has literally objectified the female physique, don’t worry- there’s also a male version that comes with a nice six-pack and an extra slot

▼ I guess even in doll form, boobs still get in the way

The USB is situated inside the doll with a soft foam protection, but it can be easily removed or replaced with other things. Just take her top off (again, literally) and pop it back on.

At a 14,000 yen (US$130) for a torso piece (other body parts sold separately), it might be a little difficult to collect them all, but just imagine the hours of fun you could have if you did!

Of course, a few people, and maybe some of our readers, may be disappointed that Choo missed the opportunity to model the new line off of the anime Hand Maid May by putting the USB hub at the back. But now he has an idea for the next line!

Head over to their store to see all the available options for Smart Doll. They are constantly growing and evolving.

Source: Danny Choo/Smart Doll
Feature/insert images: Danny Choo/Smart Doll

The Fascinating World of Mass Production

by Heather Fonseca 

Every doll you find on the shelf at Target starts as a single prototype. Many doll professionals work on creating the dolls that we all love, from Barbie to Bratz. Have you ever wondered who makes those tiny doll clothes? Mario Gesualdi is one of a handful of people in the toy industry who creates doll clothing patterns and sews these tiny garments. Not only does he create doll clothes for clients in the toy industry he also sells reproduction vintage doll patterns through his company Tailored Doll Patterns. I’ve worked with Mario for years and thought it would be fun, and informative, to interview him and find out more about what it’s like to create these miniature garments. 

You’ve done a lot of work developing dolls for production and working with manufacturers. Tell me about this part of your job.

Getting your doll on a shelf in a store is the biggest challenge. The fun part is sketching out your design, shopping for fabric, creating a hairstyle and seeing your 3-D sample come to life. Now the challenge begins by putting the doll in the box. Reality sets in and all of a sudden the dreaded “B” word shows up; Budget! Sadly in this industry perceived value determines price point. A doll that retails for $19.99 needs to be in a box that is at least 8″ wide! Consumers associate the size of the package with value. I have always disagreed with this mentality because I throw the box away and what is inside is what matters to me (also my philosophy in life). Knowing that this is a battle that we will never win we start by working backwards. Assume the retailer makes close to a 70% profit and the manufacture shoots for 50-65%, less the material costs of your packaging, overhead for shipping, employees and developments you may have a budget of $3.00 to dress that doll from head to toe. This is where I am expected to turn a sows ear into a silk purse.

Assume the retailer makes close to a 70% profit and the manufacture shoots for 50-65%, less the material costs of your packaging, overhead for shipping, employees and developments you may have a budget of $3.00 to dress that doll from head to toe. This is where I am expected to turn a sows ear into a silk purse.

So much is involved in manufacturing a doll. You need a sculptor to help you develop the body, then an engineer to translate into a program that cuts steel to make tooling molds for it. The Engineer will also help to with all you plastic parts and accessories such as shoes, purses and maybe pets.

You need a person for sourcing production fabrics that meets child safety laws globally.

Then there are production pattern-makers, sample-makers, people on an assembly line. Your fashions need to be cheap but still maintain its original aesthetic.

Dolls bodies are made from three different types of plastic materials, ABS, PVC and Poly-Pro. Mixing color for skin-tone is an art form in itself. The formula to achieve that perfect tan will be different for each material because of its chemical properties, shrinkage and cooling rate. It could take weeks to get all the parts to match perfectly.

Next the doll faces are painted. They started with “tampo” printing and then spray masks are made for each color and layer for the doll. Eye shadow has to go on first before the lashes, some doll faces have up to 15 different mask layers. Ever layer is considered an operation and I get billed per operation.

Now its time to root the doll’s hair. Hair style is costed by gram weight and steps, then styling and heat setting. The doll’s head is actually adhered to the insert first. The body is assembled, dressed then plugged into the head and secured onto the insert last before it in inserted into the package. Let’s not forget the packaging design team either. Their design work is done prior to the production process.

My goal is to give you a gorgeous doll without functional issues, in budget and on time

We are not done yet, dolls need to go to an outside lab for child safety and heavy metals testing. There are also internal tests that occur such as age and humidity, stress tests to the doll, shipping and drop testing to ensure no damage comes to the doll.

Your manufacturer will continuously send samples to you along the way for approval of each step. Some concerns are minimal but occasionally it is necessary to make on-site approvals because of the challenge of that step or time is an issue to meet schedule. These are just some of the responsibilities I take on as a Production Manager. My goal is to give you a gorgeous doll without functional issues, in budget and on time.

I loved Mattel because it was my first job in the toy industry and I worked with some amazing people and learned from the best.

You’ve worked on lots and lots of dolls. Which projects were your favorite? Why?

You might as well ask who is your favorite child. After 19 years in this business working on high-profile brands such as Barbie, Cabbage Patch Kids, Hello Kitty, Olivia the Pig, Taylor Swift, Disney’s Fairies, Princesses, Kim Possible, Jo-Jo’s Circus and licensed products like Samurai Jack, Scooby Do and The Power Puff Girls how do you choose?

If I have to pick the best experience it would be a toss-up between Mattel and a start up company called Possibility Place where I worked on AvaStars.

I loved Mattel because it was my first job in the toy industry and I worked with some amazing people and learned from the best.

AvaStars is a fashion doll with your face printing in 3-D on it. It is an amazing concept which is the ultimate personalized doll. Because it was a startup I got to roll my sleeves up, dig in and was part of the birth of something I felt was special!

Did you play with dolls as a kid? Do the things that you loved as a kid still inspire you?

Yes, I did. I have an older sister by three years who decided what and how we played when I was a child. I also loved to color and paint by numbers. My mother was a good sewer back in the day and she would give me her fabric scraps and I would try to make doll clothes for my sister’s dolls, unsuccessfully at that time.

What did you want to do when you grew up?

I was born in Providence Rhode Island and grew up in the town of Lincoln. As a child I usually wore a tie to school even though not required even in high school. I never succumbed to pier pressure and march to the beat of my own drum.

I was not the best of students with the written word; I was a visual learner. I believe that contributed to my eye for details and my sharp memory. My interests were always in Art and Design. I loved going shopping with my mom and was always moving furniture around much to my mother’s dismay.

I attended Rhode Island School of Design and graduated with a degree in Apparel Design in 1985. I worked in the garment industry in New York, Los Angeles and Boston. I eventually fell into teaching design on a college level which was extremely rewarding for me emotionally. It appealed to my nurturing side and helping students achieve their goals and dreams made me very happy.

In 1996 I was recruited by Mattel where I working in development for the Barbie brand for almost six years. I am still in the toy business but would be open to life’s next big adventure if it comes my way.

How did you get started in sewing and creating patterns for doll clothes?

I have always been a pattern maker. It’s just one of the skills I learned in school. It wasn’t until 2005 that I started making patterns for dolls, prior to that there was staff for that wherever I worked. I started making patterns for Cabbage Patch Dolls. Their bodies were a challenge, they have no shape with stretched out arms. I described it as a pin cushion with limbs!

Tell me about your doll pattern business. How did it start? 

In 2012 I started to make patterns for Barbie. A friend of mine who was an avid Barbie Collector was going to the Barbie National Convention. He also liked to design his own dolls but was not trained in that field. He asked me to make a few patterns for his designs and then invited me to the convention. It spawned the idea of trying to sell my services to that community, but how? I realized that there is a finite number of original vintage Barbie fashions out there and not everyone can afford to pay collector prices. I decided to knock them off for the home sewer. I started with a baker’s dozen of day dresses and popular fashions. I sold 117 patterns in three days! Since then I have completed a new collection each year and created a website. You can find me at TailoredDollPatterns.com. I have customers in Australia, Italy, the Netherlands and Finland! I have also been interview by the Australian Barbie Club.

How do you promote your business?

Here is where I need to have my wrist slapped. I am very bad at self promoting. I am fine with attention being brought to my work but a bit shy when it is directed towards me. The toy industry is small and we all know and promote each other so you really don’t need to advertise if your work is good. For my Tailored Doll Patterns business I finally succumb to peer pressure and started a Facebook page. I tried promoting and boosting my posts there. I photo bomb images of my dolls in environments with a cute pun attached to the name of the Fashion and post them.

This year after urging from Heather and mocking of friends at a Christmas party I signed up on Instagram. I’m open to any other suggestions!

Heather Fonseca is a freelance designer specializing in doll design and illustration. Check out her site to learn more about her services and read her blog.

Lashing Out Loud - Replacing those pesky eyelashes the easy way

Laurie Lenz, one of the jaw dropping repaint talents in the group The Repaint Society, has provided us with us awesome tutorial on eyelashes. 

I know that the majority of my ladies get crushed or missing eyelashes at one point or another - the downside to actually playing with my toys. Thankfully, it's not that hard to replace them and here's how:

What you need:

*Eyelashes...preferably a strip without glue on it. (Dollmore, or Volks sell them.)

*Aleene's Quik Dry Tacky Glue
(I recommend the Quik Dry, or you'll be waiting for FOREVER.)
(Never EVER EVER use Crazy Glue! It's from the devil.)

*Angled tweezers

*Angled scissors (that little piece of yarn is there to warn my family--"touch & die.")

*Toothpicks

*Damp Cotton Swab (not pictured.)


Hold your eyelash strip up to the doll's eye to get a rough estimate of how much you'll need.

Cut the section off the strip and gently roll your lash around a pencil to give it some curl.

Take the Quik Dry Tacky Glue and apply it to a toothpick.

(This is a water based glue.  If you ever want to remove the lashes, just wet a Qtip and dab on the lashes and they will come off. Never use any glue but a water based glue. )

Dot dot dot the glue from her tear duct to the center of her eye. (Do not go past the center.)

Apply tacky glue to half of the eyelash.

See that Q-tip? I always have a damp one there just in case I get some glue on my doll

so I can quickly wipe it off.

Allow to sit for a few seconds and then with your angled tweezers, place the lash against the eyelid -glue to glue.

With a clean toothpick, gently press the lash into place.

Go make a sandwich, waste time on Facebook, place a bid on a doll, or move your wash to the dryer, and allow the glue to dry.

Once the glue has set, press the eyelash down, so you can judge where it needs to end.

Pull the lash up gently, and cut to fit.

Pull the lash back and run a bead of glue on her upper lid, 

and run a bead of glue on the back of her eyelash.

With the clean toothpick, press down and position.

Allow the spider lady's eyes to dry.

Once they are dry, take your angled scissors and trim the lashes.

From ordinary to extraordinary. Love those lashes, Daphne!
Special thanks to Laurie Lenz for this tutorial. She the original below and check out all her other amazing work - seriously, check it out! 

http://etsylaurielenzangels.blogspot.com/2014/07/lashing-out-eyelash-tutorial.html

Modifying Heads For Hybrid Dolls - An Easy Solution

writer//Amy Namsiriwan

Iplehouse makes really beautiful dolls, but if you're like me and have need specific physiques for specific dolls, then you may want to hybrid their heads onto other bodies. However, Iplehouse dolls have large necks compared to the vast majority of bjds out there so there are very few, if any, bodies out there that that Iplehouse heads fit on without some sort of modification.

This is actually quite easy to do! Of course the method works for other hybridizations where the head hole is bigger than the neck.

You just need some clay, plastic wrap and an xacto knife or some other similar tool for shaping.

First cut 2 pieces of plastic wrap, one to cover the neck stump, one to fit in the head's neck hole:

Then take the clay, ball it up and then mold it into the neck hole:

Now take the head with the clay in it and press it down on the plastic covered neck until the head looks like it's sitting the way you want it to. At this point, the clay will have squished out some and you may need to trim around the edges:

You'll see inside the head, when you pressed the clay, that the hole for the S-hook leaves a shape in the the piece:

That shape serves as a guide to show you where you need to cut the hole for the S-hook. Make sure to leave ample room. Carving the hole too big is generally not an issue, but if you make it too small then you'll have to carve hard clay out if your S-hook doesn't fit:

While cutting the hole out, the piece may have deformed some, so fit the piece in between the head and neck again to make sure that the shape is right. At this point you can smooth it out as much as you wish as well. The only part that will be showing is the lip of the underside of the piece, so it's not really necessary to make it all that pretty, but if you're a real stickler for details, even ones that can't be seen, knock yourself out!

Now you just let the clay dry, or boil or bake the clay, depending on what kind of clay you used. Sand or finish it any way you like if you wish. You can either use the clay piece itself, or if you like, you could get a small kit and cast the piece in resin. The clay seems to work just fine though. You can paint the lip that shows to match the doll's skin if you wish, but I find that mine isn't really seen much in pictures.

Even hardened clay is usually somewhat soft and still carvable with carving tools, so even if you find that your new piece needs some adjusting after it you thought it was finished, it can still be changed. Either carved out, or you could use a hot glue gun to add on, which I like to do since I trust the hot glue as sueding against the resin. Clay seems to hold pretty well against resin, but i still like glue.

The end!

Hope this helps some people!

Sorry for the rough example, but I'm doing this quickly and I'm not actually making a new piece for use since I already have one so I'm not going to take the time to make a fully finished smoothed out piece.

For other tutorials, visit Dirili's homepage: HERE 

and the doves cried...but, will this mean the return of Le Petit Prince?

As we all mourn the untimely, and down-right shocking news of Prince passing, I secretly have to hope that the world will finally be able to enjoy Prince more now. His videos, concerts and recordings that have been held so tightly for so long may finally see the light of day once more. 

I would very much like to enjoy the antics of Le Petit Prince once again too.

In 2011, Seattle-based artist Troy Gua paid tribute to his favorite artist via a very charming and amazingly detailed doll: Le Petit Prince. However, after his work went viral in 2012, Prince and his people were not amused and "requested" (via a cease and desist) that he remove all images of the project from his website. Of course, no images are "gone" from the internet, so...here they are. (All images are property of Troy Gua)

Tonight, we will watch Purple Rain and shed a few tears, but ultimately celebrate one of the most talented musicians ever to walk this Earth. 

RIP Prince Rogers Nelson - man, that one hurts a lot to say


Making a custom wig - Not as hard as I imagined

I found this fantastic tutorial today and was mesmerized watching her. I'm sharing part 2 which is about placing the hair on the wig, I think making the cap is probably fairly simple and I'll leave it to you to go to her site and watch that one.  I really just wanted you all to see that it isn't as hard as you might think to make your own.

Of course, I probably never will as I'd prefer to pay someone else to do it, lol...BUT if I got crafty (though my crafting skills are really limited) I actually think I could pull this off. So who knows, maybe I'll get industrious one day and give it a shot ;)

Give this a watch and check out Unniedolls website for more. She does some fantastic mods and repaints.

REVEAL - the May Lookbook - Fashion Doll cover

Each issue of the STAND Lookbook will feature two variant covers. A bjd cover and a fashion doll cover. If you purchase a physical copy for your collection you will have the option of choosing whichever cover you'd prefer. 

The fashion doll cover of our first issue is by Dollcis. For those unfamiliar with Paul Pham and his Numina ladies, I highly recommend you take a peak!

Thanks so much Paul for contributing this image! If you'd like the chance to see your work featured on the cover of an upcoming issue click the CONTACT link at the top of the page to learn how. 

Matchbook nightstand

I stumbled upon this one and thought it was a fantastic idea and fairly simple to follow along.  I was finally able to trace it back to the original poster, who does some fantastic crafts, so be sure to check her out. (I'm also completely jealous of her nails, though I wouldn't be able to function - they are beautiful)