Photo blogger and STAND editor-in-chief, Sharon Wright, lines out 12 keys to success
Read More12 Tips to Being a Better Photo Blogger
in articles, bjd, BJDs, fashion doll, Fashion Dolls

ball jointed doll
Photo blogger and STAND editor-in-chief, Sharon Wright, lines out 12 keys to success
Read MoreIf you collect resin dolls, eventually they all start to yellow. Whatever light they are in, whether it is direct sunlight, indirect light, indoor lighting or, hell, just age - they all have an effect on the pigment of the resin and all - sadly - turn various stages of yellow. As the color pigments in resin begin to break down and fade the one color that seemingly doesn't is yellow. Red pigments fade the fastest and every brand, color and type will all react differently and fade at different rates.
There is no way to avoid yellowing, it is a natural occurrence in the resin BUT there are ways to slow it down
The main way is to avoid sunlight. That doesn't mean you can't take your dolls outside for photoshoots (I'd be completely screwed if I couldn't play outside with my dolls!) Just don't leave them sitting around outside in the sun for hours or days. A small amount of sunlight is not going to immediately damage your dolls. Go play dammit, just do it smart!
Use a UV resistant sealant. There are a number of really great ones on the market, Mr Super Clear is probably the best known but ask around, there are new products out that I'm not familiar with - check with your favorite faceup artist, they will usually know what works best. Sealants can yellow, btw. That is easily fixable with a quick wipe and new faceup but the resin itself won't yellow.
Lots of other ways you can try to slow the yellowing process is to keep them in a room with the curtains drawn, you could dress them in clothing that completely covers them (though some dark clothes stain certain resins...), keep them all hidden away from everything and everyone in sealed boxes where nobody will ever see them (really, whats the point of having them then if you can't enjoy them?)
Oh - and keep them away from cigarette smoke. Just like your teeth, resin will absorb it and turn yellow too.
Look, yellowing is natural and inevitable - that doesn't mean you shouldn't enjoy your dolls. They are meant to be played with, customized, looked at, photographed and redressed. THAT is why you got into bjds to begin with, right?
WELL - funny you should ask. There are a few different options.
The sure fire way - you can sand off the yellowed resin with a high grit paper to remove the top layer and expose the original color.
The other way - paint it or dye it. Read how to below.
(Note - the post below is copied from Den Of Angles. I have tried to locate the original author to ask permission to share this but have been unsuccessful. I think it's really valuable information and encourage you all to please visit the original post to read about others results and modifications. There is some really fantastic advice from a number of members and lots of comparison pics too.)
Author - Cymorill (DoA)
I've posted a few experimental restoration threads in the past for mildly yellowed and mellowed resin, but I've finally perfected it in an easy-to-use method! This works for both sanded and unsanded parts! Please be aware that each part must be either unsanded (like hands and feet) or completely sanded if the seam lines have been removed to give an even tone! This method uses a special mixture of RIT dye to restore the red tones to resin that has faded and taken on that "zombie" hue.
Supplies:
1 bottle each of liquid (not powder) RIT dye according to the below formula
1 small glass bottle
1 eyedropper (or bottle with eyedropper top)
Water
Pan
Stove
To make "De-Zombification Serum" :
(Since the colors supplied by your local craft or fabric store can vary, I'll list a few different serum formulas)
Formula #1: Mix 1 part Scarlet Red, 2 parts Golden Yellow, and 3 parts Petal Pink in the small glass bottle. Close and shake until blended.
Formula #2: Mix 4 parts Rose Pink, 1 part Tan.
*Note: But my doll is already yellow! Why add yellow or tan dye? Because straight out red dye makes a doll look sunburned. The yellow tones in the resin also break down, but not to the extent that the red does and not as quickly. This mixture provides a flesh color, not that freshly-spanked-bottom blush.
**Another note: Interestingly, this serum looks like fresh blood.
To use "De-Zombification Serum" :
** Make certain all doll parts are clean and free of MSC, blush and paint **
1. Measure out enough water to cover your doll parts and pour it into the pan.
2. Heat water to just under a boil (when it starts to get bubbles on the bottom but is not actively boiling)
3. Using the eyedropper, add 3 drops serum for every 1 cup of water and stir well.
4. Begin with a test piece. This should be an arm or leg piece, something smooth and easy to sand if it's left in the dye bath too long.
5. Submerge test piece in dye bath. Remove after 30 second and rinse thoroughly to check color. If the color is still too light, repeat until desired flesh tone is achieved. This will be your total soaking time! Soaking times will vary for each doll due to resin type and degree of yellowing. The time does not vary for sanded vs. unsanded parts of the same doll.
6. Submerge remaining doll parts in the bath, allowing them to soak for the established soaking time, stirring occasionally.
7. Remove pieces and rinse thoroughly in running water. Dry, and allow to cool.
8. If the color on a single piece is too dark or uneven (due to poor sanding) wipe the part with nailpolish remover and a cotton ball while the part is still warm. This will remove a little of the dye.
9. If your doll is too large or your pan is too small to soak all the parts at once, that's okay. BUT you must make a new bath for each batch of parts, as subsiquent batches will be lighter as the dye is used up. Dye time will be the same for each batch of the same doll.
That's it! This same method can also be used to color match hybrid parts.
The De-Zombification Serum can be saved and used again later. As with any dye project, be certain to observe the usual precautions. Careful not to get any of the serum on your hands or you might transfer it to you resinoyd and stain it.
Example: To restore a very faded Luts Kid Delf, I soak the parts for 1 1/2 minutes. To color match a very faded Kid Delf to a Minifee head, I soaked the body for 4 1/2 minutes.
Some comparison pictures
Non-sanded parts:

Sanded parts:

Do you have any tips or a solution that works for you - be sure to share it below so that others can benefit from your experiences. I'm still fairly new to all of this so I'm genuinely interested in learning!
Japanese dollmaker RML has introduced a new system through which customers can design their own fantasy doll’s face with extreme precision and have it 3D printed for a customized 3D printed doll. In addition to the customized facial features for the fantasy dolls, RML manufactures them as ball-jointed dolls, meaning they can be easily moved and made to hold positions thanks to articulated ball and socket joints.
RML’s dolls, which look like anime figures come to life, are impressive as is, but now with the new customization feature, are being taken to the next level. Through their recently launched (and free to use) RML 3D Facemaker program, customers can choose how exactly they want their 3D printed fantasy doll to look like through a number of adjustable parameters. From skin color, to face shape, to feature sizes, and even to accessories, RML’s clients can create any kind of doll they want—even a lookalike!
The anime-style ball-jointed dolls (aka BJD dolls), a phenomenon predominant in Japan, South Korea, and China, are also available in a wide range of sizes, from as small as 10cm in height to as large as 1 meter. So whether you’re a BJD doll collector or an eager child, the possibilities are virtually limitless.
Should you use RML’s 3D Facemaker program, you’ll be given the option of customizing a wide range of your doll’s features (really, it’s impressively extensive) and once satisfied with the design you can select the “creation code” button, which will automatically generate a 3D printable file for the face model. This code is then sent to RML’s factory, where the 3D printing will begin. As the company explains, the face is first printed from a nylon material and then polished and colored by hand by a team of experts. The results, I must admit, are flawless.

In addition to the customizable 3D printed faces, customers can also choose from a range of 3D printable clothing and accessories from RML’s online shop, which can either be ordered or printed at home. If ordered, the doll clothes are 3D printed out of a flexible acrylic acid and are made to specifically fit RML’s custom ball-jointed dolls.
For pricing click HERE
images property of RML
Special thanks to OP 3ders.org
Man, This is when I love my job the most, when I get a chance to play with something brand new! I adore my collection but the thrill of taking a new doll out of the box and discovering it's 'voice' is what drives my creative juices. And, when it's a doll that isn't quite available to the public yet - well it makes it just that much more special.
Ginny, by Linda Macario, stands 17.7 inches and is coming very soon to Jpopdolls.net
I shot her in various wigs and styles but you can really tell when I fell in love with her. As soon as I popped that gorgeous shoulder length straight red on her it was instantaneous. She really sprang to life and I became quite inspired as her personality began to develop. She is adorable in frills and bows but, for me, I love her with a slightly geeky style.
Visit Jpopdolls.net to learn more about Ginny. (I should also mention that all the wigs are from Jpop too - they do some seriously fantastic wigs!!!)
Photo blogger and STAND editor-in-chief, Sharon Wright, lines out 12 keys to success
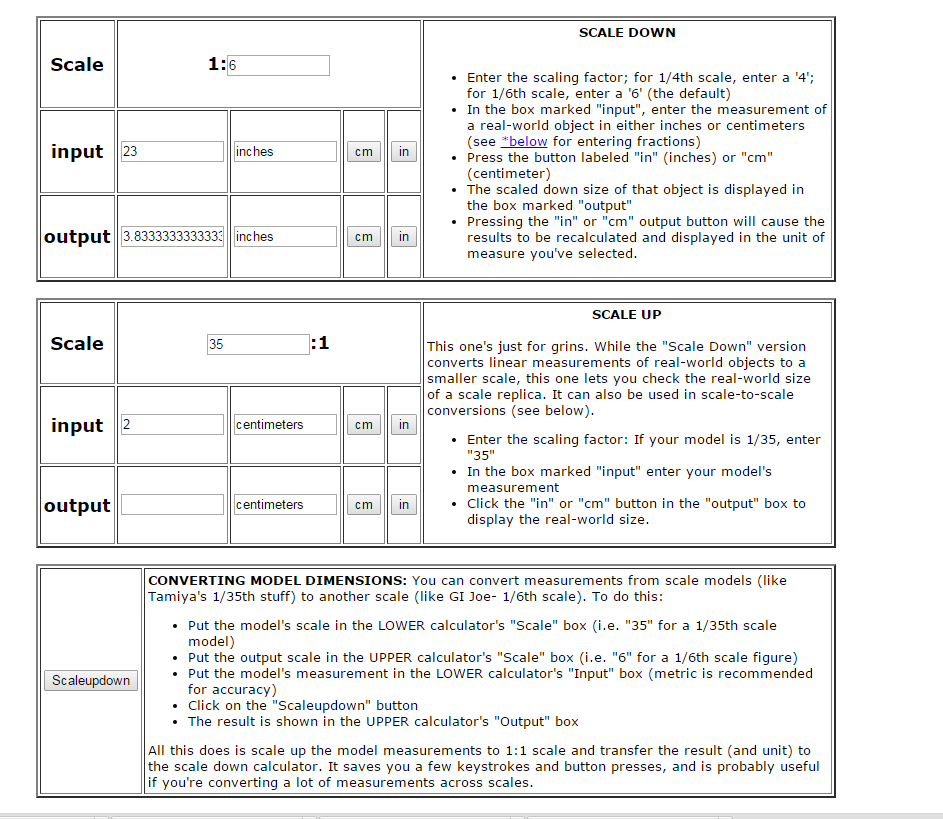
For those who are math challenged, like myself, THIS ONES FOR YOU!
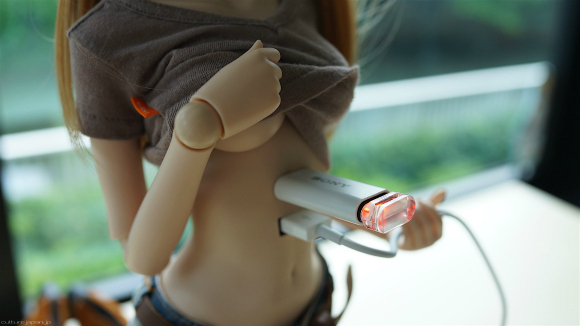
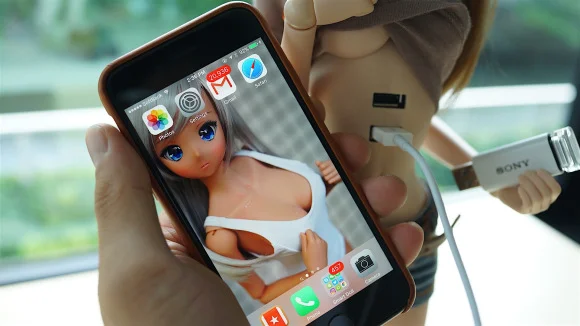
Read MoreDanny Choo turned heads last year when he introduced his line of Smart Dolls, first modeled off the mascot of Culture Japan, Mirai Suenaga.

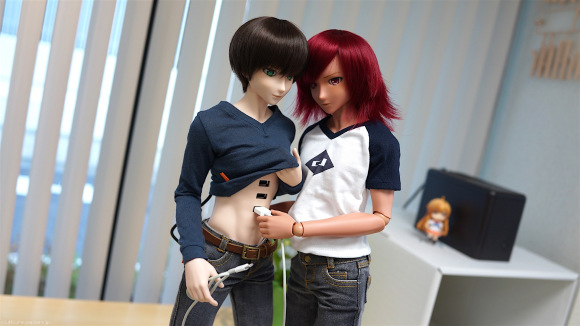
These dolls fuse Japanese ball-jointed craftsmanship with useful functions like the ability to hold game controllers and other objects up to 700 grams (about 1.5 pounds), to tell time, and, now with his latest addition to the series, She can do even more.
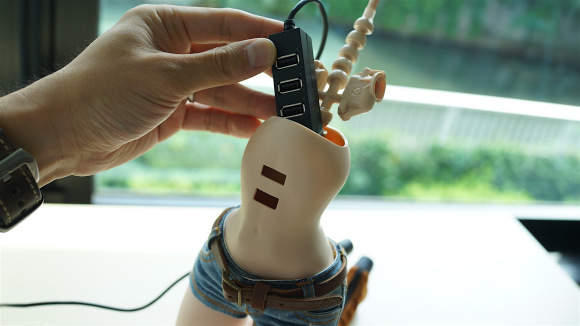
Whether it's charging your mobile accessories, connecting an external hard drive, maybe even hold an external web cam, she can do it all with a built-in USB hub.
For folks who face first world problems like the USB sockets being on the backside of an iMac, you can now easily gain access to USB ports via Smart Doll USB Hub
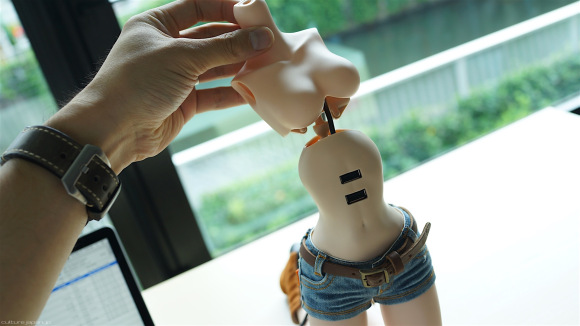
The female torso option has two conveniently located USB slots for all your gadgets.

But for those of you concerned that Choo has literally objectified the female physique, don’t worry- there’s also a male version that comes with a nice six-pack and an extra slot

▼ I guess even in doll form, boobs still get in the way

The USB is situated inside the doll with a soft foam protection, but it can be easily removed or replaced with other things. Just take her top off (again, literally) and pop it back on.


At a 14,000 yen (US$130) for a torso piece (other body parts sold separately), it might be a little difficult to collect them all, but just imagine the hours of fun you could have if you did!


Of course, a few people, and maybe some of our readers, may be disappointed that Choo missed the opportunity to model the new line off of the anime Hand Maid May by putting the USB hub at the back. But now he has an idea for the next line!
Head over to their store to see all the available options for Smart Doll. They are constantly growing and evolving.
Source: Danny Choo/Smart Doll
Feature/insert images: Danny Choo/Smart Doll
Photo blogger and STAND editor-in-chief, Sharon Wright, lines out 12 keys to success
writer//Amy Namsiriwan
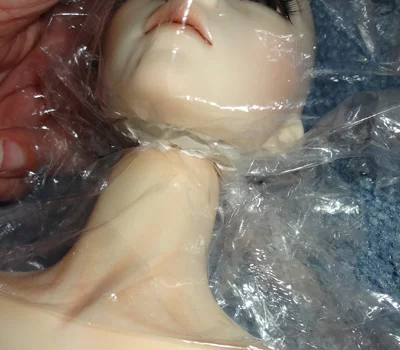
Iplehouse makes really beautiful dolls, but if you're like me and have need specific physiques for specific dolls, then you may want to hybrid their heads onto other bodies. However, Iplehouse dolls have large necks compared to the vast majority of bjds out there so there are very few, if any, bodies out there that that Iplehouse heads fit on without some sort of modification.
This is actually quite easy to do! Of course the method works for other hybridizations where the head hole is bigger than the neck.
You just need some clay, plastic wrap and an xacto knife or some other similar tool for shaping.
First cut 2 pieces of plastic wrap, one to cover the neck stump, one to fit in the head's neck hole:

Then take the clay, ball it up and then mold it into the neck hole:

Now take the head with the clay in it and press it down on the plastic covered neck until the head looks like it's sitting the way you want it to. At this point, the clay will have squished out some and you may need to trim around the edges:
You'll see inside the head, when you pressed the clay, that the hole for the S-hook leaves a shape in the the piece:

That shape serves as a guide to show you where you need to cut the hole for the S-hook. Make sure to leave ample room. Carving the hole too big is generally not an issue, but if you make it too small then you'll have to carve hard clay out if your S-hook doesn't fit:

While cutting the hole out, the piece may have deformed some, so fit the piece in between the head and neck again to make sure that the shape is right. At this point you can smooth it out as much as you wish as well. The only part that will be showing is the lip of the underside of the piece, so it's not really necessary to make it all that pretty, but if you're a real stickler for details, even ones that can't be seen, knock yourself out!

Now you just let the clay dry, or boil or bake the clay, depending on what kind of clay you used. Sand or finish it any way you like if you wish. You can either use the clay piece itself, or if you like, you could get a small kit and cast the piece in resin. The clay seems to work just fine though. You can paint the lip that shows to match the doll's skin if you wish, but I find that mine isn't really seen much in pictures.
Even hardened clay is usually somewhat soft and still carvable with carving tools, so even if you find that your new piece needs some adjusting after it you thought it was finished, it can still be changed. Either carved out, or you could use a hot glue gun to add on, which I like to do since I trust the hot glue as sueding against the resin. Clay seems to hold pretty well against resin, but i still like glue.
The end!
Hope this helps some people!
Sorry for the rough example, but I'm doing this quickly and I'm not actually making a new piece for use since I already have one so I'm not going to take the time to make a fully finished smoothed out piece.
For other tutorials, visit Dirili's homepage: HERE
Donec id justo non metus auctor commodo ut quis enim. Mauris fringilla dolor vel condimentum imperdiet.
Commodo cursus magna, vel scelerisque nisl consectetur et. Donec id elit non mi porta gravida at eget metus.
Lorem ipsum dolor sit amet, consectetur adipiscing elit. Vestibulum id ligula porta felis euismod semper.
Quisque iaculis facilisis lacinia. Mauris euismod pellentesque tellus sit amet mollis.
Sed purus sem, scelerisque ac rhoncus eget, porttitor nec odio. Lorem ipsum dolor sit amet.
Vivamus pellentesque vitae neque at vestibulum. Donec efficitur mollis dui vel pharetra.
Praesent id libero id metus varius consectetur ac eget diam. Nulla felis nunc, consequat laoreet lacus id.
Donec id justo non metus auctor commodo ut quis enim. Mauris fringilla dolor vel condimentum imperdiet.
Commodo cursus magna, vel scelerisque nisl consectetur et. Donec id elit non mi porta gravida at eget metus.
Lorem ipsum dolor sit amet, consectetur adipiscing elit. Vestibulum id ligula porta felis euismod semper.
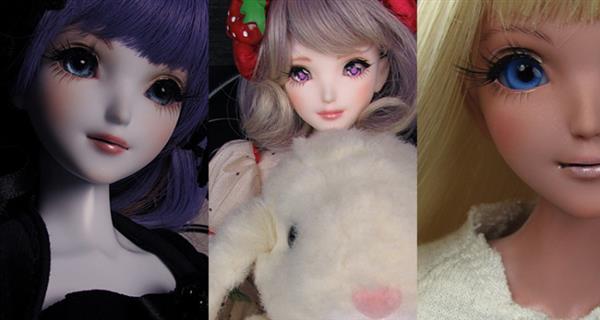
I found this fantastic tutorial today and was mesmerized watching her. I'm sharing part 2 which is about placing the hair on the wig, I think making the cap is probably fairly simple and I'll leave it to you to go to her site and watch that one. I really just wanted you all to see that it isn't as hard as you might think to make your own.
Of course, I probably never will as I'd prefer to pay someone else to do it, lol...BUT if I got crafty (though my crafting skills are really limited) I actually think I could pull this off. So who knows, maybe I'll get industrious one day and give it a shot ;)
Give this a watch and check out Unniedolls website for more. She does some fantastic mods and repaints.
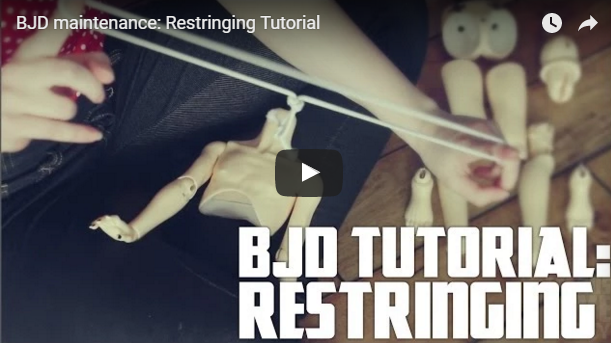
Icarus Love Melody does a fantastic job of showing us how to restring. Many of us have dolls that get kicky (too tight) or floppy and lazy (too loose) - and Lord knows, I'm the only lazy bitch allowed around here!
This looks way more simple that I thought it was. Maybe a few of my dolls will get tightened up a bit now.
Hmm, can someone please come pull my strings and tighten me back up too? ;)
Want to bond wood to glass? Styrofoam to rubber? Here's the answer.
Feature photo by Hep Svadja. Chart design by James Burke.
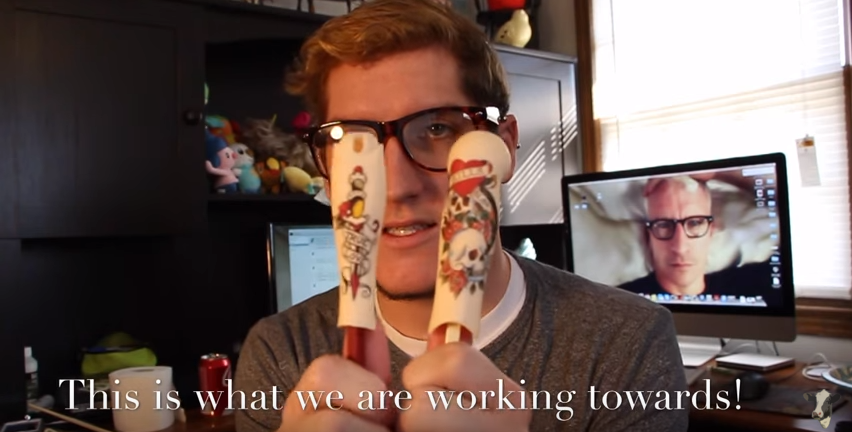
Oh, you guys know I love tattoos, or maybe you don't, but you do now!
Can you believe I don't own a doll with any tattoos though. It's something I really need to fix and I found this tutorial to help me do just that!
Who knew it would be that easy!
I stumbled upon this one and thought it was a fantastic idea and fairly simple to follow along. I was finally able to trace it back to the original poster, who does some fantastic crafts, so be sure to check her out. (I'm also completely jealous of her nails, though I wouldn't be able to function - they are beautiful)