fashion doll

Getting Naked - baring it all behind the scenes

by Sharon Wright

Cat Hammond, over at The Doll Affinity, wrote a really fantastic post in response to my article about 12 Tips To Being a Better Photo Blogger.  In it, she talks about wanting to be more candid and pulling back the curtain a little to show some of the magic in the process of this hobby we love - photography. It really connected with me. I love watching behind the scenes videos and seeing other peoples' BTS photoshoots and whatnot - but I really haven't shared any of my own.

Since Cat sort of challenged others to do it, I thought I would kick it off and strip down to my bare bones. You'll see that I am not a perfect photographer, that most of the 'magic' actually happens in the editing room. 

To start off with, I shoot on a Canon T3i. It's not a super fancy camera, more of an older (discontinued) lower end pro-sumer style DSLR. I have a few different lenses but my lens of choice is my nifty fifty, 50mm. I shoot in full manual mode and usually manual focus as well. I prefer to shoot in RAW as that gives me the greatest flexibility to fix all my mistakes ;) I work in Adobe products for post processing. 

Now, I need to say this because it comes up all the time. It is not the camera that takes great pictures. Yes, it helps, but it is the skill and eye of the photographer and editor that makes it amazing. There are some pretty freaking jaw dropping images I've seen that were shot on a cellphone camera - so there are zero excuses. All the tools are available on the internet for you to learn any skill you want. That is how I taught myself. 

For this challenge, I tried to select a few different things to give you just a simple quick peek at my before & afters.  

Anyway - here goes... 

Brazen Beauty Natalia Fatalé - one of my all time favorite Integrity Toys ladies. She is from the 2013 convention (my first, and favorite, convention of theirs)
Dress by Ursi Sarna

Underexposed. She was shot deep in the shadows and since I didn't want to drop my shutter speed lower (to avoid blurriness from camera shake) I chose to take the darker shot at a faster shutter speed to get a crisper shot.  I knew, since I shoot in RAW, that I would have the ability to easily adjust the colors and contrast in post processing. I could have adjusted my ISO but I was, honestly, just being lazy. I fixed a few crazy hairs and added a bit more sun haze coming from the left side of the shot. 

Intrigue Elise Jolie by Integrity Toys, from the 2014 convention
Dress by Ginny Liezert

Same shoot, same day. This time I overexposed. Not on purpose. I snap a few shots as I'm making my adjustments in the camera. Sometimes the first couple pics end up being good and I want to save them, Again, since I shoot in RAW, I was able to fully adjust and play with the lighting in post. You'll notice that I also fixed a couple stray hairs and the gap in the petals on the dress too.

This shoot is one I did for Mombie & Son (Bo Bergemann and her son). It was an entire series of about 40 amazing, cinematic style images promoting their zombie bjds they featured at the 2015 SDCC. (Seriously, it's pretty damned cool. You can check the shots out HERE)

As you can tell I photoshopped some lights onto the vehicle to add a bit more realism to the 'moment' that was captured. I also adjusted the color levels to get a more creepy/greenish/horror feel to it and a bit more haze to give it a bit more 'tooth'. This was shot during the later half of golden hour and the effect of the sunlight in the hair and the movement in the dolls just really made these shots work so beautifully in creating that "movie moment" I was going for.
Without a doubt - one of the funnest and most creative shoots I've ever done!

Ginny, by Linda Macario. Coming very soon to JpopDolls

This one was really fun. Most people know me for being a mostly outdoor, natural light photographer. I don't do a whole lot of indoor diorama shoots - not that I don't enjoy them - I'm just not great at lighting them or working with flash effectively - but I'm trying to learn.  
I bought this fantastic bed set on Etsy from One Sixth Avenue, originally to use for my Naked Trooper series (absolutely NSFW). However, when I put glasses on Ginny she instantly came to life with this fantastic geekness to her and I knew she would have a bed set like that - and, like all teens, she'd have a really messy room.  
I got two really awesome paper lanterns (that actually lit up) in my 70's themed One Sixth Box a couple months ago and I had a desk lamp from the Dollar Tree that lit up. I used a few LED lamps placed just under the "TV" to give the effect that she was watching something and then placed a small lamp just to the right of the room on the other side of a velum paper window to give the illusion of maybe a street lamp or house light at night.
As you can tell, I did not adjust my white balance well so the original shot is very yellowish. No problem, I can easily adjust the colors when I bring the image in. I enhanced the lights to give them a bit more glow, adjusted shadows and selectively increased the exposure in some areas.
There are a lot of things I wish I still knew how to do better, but over all I'm pleased with how it turned out.

I never really put a lot of thought into showing my process, but after reading Cat's post I realized that I too love seeing the nakedness of other peoples work - so why not bare my own.

I will try to do posts showing my process more. And, if I don't - remind me and I'll make sure to get it done ;)

Oh - and for real - check out The Doll Affinity. Her 1:6 mini-me Cat is the best ever, and she does a dynamic job putting together some truly creative photo stories. 

We'd love to see your shots as well. Are you daring enough to get naked in front of your peers? Post them on our Facebook page under this link. 

To see more of my crap - a.k.a. - the stuff I do when I'm not working on STAND...
Facebook
Instagram
Flickr
All the NSFW stuff ;) 

12 Tips to Being a Better Photo Blogger

12 Tips to Being a Better Photo Blogger

Photo blogger and STAND editor-in-chief, Sharon Wright, lines out 12 keys to success 

Read More

Artist Rises To The Challenge For Kings Of Leon Album Cover

Renata Jansen, of Painting The Clouds, was given the opportunity of a lifetime. She was tasked with creating four portrait heads of the band Kings Of Leon.

We couldn't resist getting a bit of the back story and sharing it with you. In her own words she shares her experience.


One evening in June, just before bed I got an email from Kim Malone at The Dollery. It was so exciting that sleep was then definitely out of the picture! She asked me if I was interested in sculpting portrait heads of all four band members of the Kings Of Leon, the answer of course was YES!

Of course once the initial excitement wore off what was left was panic! I had less than a month to produce four portrait heads and I am definitely not known for my speed! When you have to do something though its amazing how you can find the ability and strength. I started from day one to mark each day off on the calendar to make sure that I finished in time as there are no extended deadlines when you are working towards an album release! I worked every day, all day and just made it, afterwards I slept for about 4 days!

I started by looking for photographs of each band member on the Internet. I was not lucky enough to work from life or photographs taken for the project as the band are very busy. The heads were built around a brass tube which runs from the top of the head to just under the chin. This made it possible to attach them to wooden dowels under the milk for the photoshoot.

I use a mix of Cernit and Fimo polymer clay, it creates relatively firm clay which is good for sculpting details on portrait work. Each head took 4 days to sculpt and another day to paint, extra days were also needed to make eyes and a skull armature for each head. I also needed to take photographs and film clips as I worked so that they could use them to make a short film about the making of the album cover. If you would like to see this it is on the Kings Of Leon face book page. Sometimes I almost forgot to take the photographs, I would get so into sculpting and suddenly realize it had been ages since I took a photo or film clip! I started leaving myself a note on my desk so that I saw it every time I looked up from my magnifier!

I made many pairs of blue eyes in order to find just 4 pairs that matched perfectly. I had to add eyelashes and make sure they would survive being splashed with water and milk. The paint I use is set with heat and is waterproof so that was thankfully not a problem. I didn't need to give them hair because only their faces would protrude from the milk for the photograph.

This was definitely the most challenging project of my career so far and also the one that taught me the most. It didn't always feel it at the time but its was a really wonderful experience which I was extremely lucky to have been a part of!


To see the sculpting process for each head - click the pics below. It's so facinating to watch them come to life!

Visit Renata to learn more about her work
Website
Facebook

This Super Amazing Handy Dandy Scale Converter Will Save Your Sanity!

If you hate to math - like me - then this will change everything!

I was trying to make a newspaper today as a prop for a shot I'm working on and wanted to scale it down to 1:6 size. Well, I'm HORRIBLE at math, seriously, I can't math at all. That is when I stumbled upon this little gem...

SCALE CONVERSION CALCULATOR

If you ever want to scale something up or down - this will save you time and headaches!!!

Check it out and bookmark it for future use!

Here are the Top 10 Most Expensive/Valuable Barbies

Yes, I know, I don't do Barbies here - but I find it interesting and know that many of you, especially on the fashion doll side, are Barbie collectors too.  

If you were told to name a doll toy off the top of your head, chances are, you’ll probably say BarbieーI mean who hasn’t heard of them right? Plastic, with bendy arms and painted make-up, Barbie dolls are one of the most popular toys for young girls. Having accompanied many children through the generations, they are seen by many to be an important part of the fashion doll industry; some may even dare say that they’ve become ea part of the American life. Since they were first created in 1959 by business woman, Ruth Handler, billions of Barbie dolls have been sold all around the world. They are currently the best, and most profitable product of the American toy company, Mattel.

Handler first had the idea of making a fashion doll after realizing the lack of adult-figured toys during the 1950’sーmost had been representations of toddlers or infants. Wanting to close the gap in the toy market, she presented her thoughts to her husband, Elliot, who was then the co-founder of the American toy company, Mattel. Although her idea was dismissed by many at the time, Handler would eventually create and design the first Barbie doll, based on an adult-bodied doll which she’d purchased in Germany. The toy first made its debut at the American International Toy Fair in March 9, 1959ーthat date would later be considered as Barbie’s birthday.

Since then, countless designs of Barbie dolls have been produced by the companyーeach with their own unique, different looks. In fact, just this year Mattel has announced that they will be producing them in three body sizesーtall, curvy and petite! Besides the doll itself, a number of accessories for the toys have also been released such as purses, shoes, and jewelry, as well as other merchandise such as cosmetics, books and video games. Barbie even starred in the popular Toy Story film series! While she may just be a plastic doll, Barbie has attracted a number of hardcore fans and collectors over the years and like all collectibles, there will always be some that are more valuable than others. So what are the most valuable, and expensive Barbie dolls? Read on to find out!

#10 – Bob Mackie Gold Barbie:  Over $150

Designed by fashion designer, Bob Mackie, only a limited amount of the Bob Mackie Gold Barbie have ever been released; it was first distributed through a Mattel World of Imagination Party in 1990. The beautiful golden doll is also unique in that it features the designer’s signature. First officially release in January 1990, the alluring Bob Mackie Gold Barbie doll sports a beautiful gold sequinned gown with a soft, feathery white boa. With her platinum blonde hair pulled up into a high pony tail with a matching golden headpiece, only one word can describe her appearanceーelegant. She also comes with golden bracelets and earrings to complete her shiny, look. If you’re looking to add the designer doll to your collection, know that it’ll probably set you back at least $150 for one new in box with all its accessories

#9 – Live Action Christie Barbie : $300

The first African American Barbie doll ever to be made by the company, the Live Action Christie was first released in 1968, alongside Live Action Barbie. Dressed in an orange and fuchsia print pant suit, she modelled a matching orange headband and a pair of orange heels. Unlike many of the traditional barbies, the dark skinned figure had flexible limbs; the waist could swivel and their knees, ankles and elbows would bendーa feature which allowed it to be positioned in many ways. While the condition of the doll is always an important consideration in determining its value, for Live Action Christie, you’d want to pay more attention to her hairーas the dark colour often fades and reddens with age. A new, mint-in-box version of the doll currently goes for around $300 online.

#8 – Pink Splendor Barbie: $350

First released in January 1997, only 10,000 copies of the Pink Splendor Barbie doll has ever been made and distributed in the world; it originally retailed in stores for $900. Dressed in a beautiful rose coloured silk gown with delicate, gold lace trimmings, her ornate bodice also features elegant gold lace, over a layer of intricate pink taffeta adorned with gleaming rhinestones. Her exquisite dress also forms a wide, bow at the back that flows down to hover between the intricate pink roses on her backside. She also comes adorned with a lovely crystal necklace on her neck, along with matching crystal earrings; her hair is also put up in a graceful braid, with a matching headpiece. A match for any serious Barbie collector, this doll is likely to cost at least $350 today.

#7 – Vintage Put-Ons and Pets Kitty Kapers: $500

Although this Barbie set doesn’t actually come with a doll, don’t let that fool youーit will still cost you an arm and a leg! Different from traditional Barbie doll products, the Put-Ons and Pets Kitty Kapers comes with a pet and a lovely outfit for Barbie herself. Featuring her white kitty cat, complete with blue beaded eyes and a pink stitched nose, the set also comes with a colourful floral polka-dotted patterned skirt, adorned with delicate white lace as well as a matching pair of shorts and a long sleeved top. Oh but let’s not forget about the accessoriesーBarbie’s going to need her white, lace-up boots and kitty’s going to need her bowl of cat food as well! If you’re lucky enough to find one for sale, know that the current going price for one new-in-box is around $500.

#6 – Barbie, Ken and midge on Parade Gift Set: $600

Released in 1964, this collectible set featured three dollsーBarbie, her boyfriend Ken and her best friend, Midge. Dressed in a red, long sleeve shirt with gold trimmings and a (dangerously) short white skirt, Barbie is definitely eye-catching in her marching band uniform. But what good would she be without her other half? Beside her in the set is Ken, who sports a clean, white uniform with red and gold stripes, along with long red pants. Don’t forget about Midgeーshe’s the third in the set, and is dressed in a white, wool boat-neck sweater (with a striking “M” logo) and a red knee-down skirt. Also included are two red and white pom poms, the pair’s uniform hats and a pair of marching batons. Awfully difficult to come by nowadays, a set in good condition will most likely set you back at least $600.

#5 – Devi Kroell Barbie: $1075

Created and designed by New York fashion designer, Devi Kroell for a charity auction event, this one-of-a-kind Barbie doll was sold to a collector for a whopping $1075 in 2010. Fitted in a fashionably stylish overlong sweater with a cute knot at the front side, the doll also sported a pair of snazzy gold pantsーcomplete with glow and shimmer. While one hand was adorned with a matching black and silver bracket, the other hand held in it, a beautiful red leather purse with an intricate golden chain. Hair slicked dashingly to the back, the doll also had on a pair of elegant heels which helped to fulfill the entire look. While there’s no doubt that this Devi Kroell Barbie looks fantastic, it might be a hard item to collectーseeing as how there’s only been one ever made in the world (which already has a home)!

#4 – Lorraine Schwartz Bling Barbie: $7500

Designed by New York City jewelry designer, Lorraine Schwartz, this bling Barbie flaunts beautiful diamond jewelry (valued at over $25,000)ーincluding a pair of gorgeous hanging earrings, a pair of diamond trimmed high heels, a number of stunning bracelets and a signature “B” pendant around her waist. As a collaboration with the Council of Fashion Designer in America, only twelve of this doll was ever made in the world by Mattel, making it a truly unique collectible piece. Dressed in a black, tight-fitting tube dress, this Lorraine Schwartz Bling Barbie sold for a hefty sum of $7500 at a recent auction (which is cheap, considering the value of the diamonds). Considering the fact that only a limited number exists, it may be a challenge to locate one for sale, should to want to add it to your collection.

#3 – The Original Barbie: $10,000

The first Barbie doll ever to be created, this original figure is one of the most sought after by collectors today. Originally introduced on March 9, 1959, this phenomenal figure is dressed in a striking black and white bathing suit, which accentuates her slim body; only 350,000 units were estimated to have been released at the time. With distinctive white irises (later ones would have blue irises), and arched eyebrows, this original Barbie doll truly has vintage written all over it. One attribute that distinguishes from the later barbies, is the fact that she has round holes on her feet; another distinguishing feature is that the doll has no marking on the back of the head. While this doll has been recreated many times throughout the years, only the original from the 1959 commands the highest valueーwhich is estimated to be in the thousands.

#2 – De Beers’ 40th Anniversary Barbie: $85,000

Created to celebrate Barbie’s 40th birthday in 1999, this anniversary Barbie fashions a flowing twilight garb which is reminiscent a gypsy dancer. Adorned with white gold jewelry, this raven-haired doll also has around her waist a belt that is encrusted with 160 diamonds (her bikini also has some bling) from the international big name jewellers, De Beers. Thought to be one of the most valuable, and expensive Barbie dolls of all time, the De Beers 40th Anniversary Barbie last sold for a stunning $85,000 in auctionーcomparable to the price of a car! If you’re itching to add this dear doll to your collection, then you may have to be prepared for a major dent in your walletーthat is, if you’re lucky enough to find one for sale!

#1 – Stefano Canturi Barbie: $300,000

Created by fine jewelry designer, Stefano Canturi, this one-of-a-kind doll currently has a hefty price tag of $300,000ーit had taken Stefano himself close to four weeks to design and complete from head to toe.. Commissioned by the Toy company itself, the precious Stefano Canturi Barbie features an upscale jewelry set which includes Stefano’s “Cubisim-style” necklace made from three carats of white diamonds, and a carat of the extremely rare emerald cut pink diamondーshe also wears one of the company’s iconic diamond rings on her right hand. From her beautiful black dress to her perfectly done eyelashes, this high fashion Barbie doll will truly dazzle any crowd with her beauty. It was auctioned off at Christie’s in New York for $300,000 in October 2010, with the proceeds going towards the Breast Cancer Research Foundation.

Are you a Barbie doll collector? Let us know your favourite piece in the comments below!

Brooke Carter
Freelance writer who loves dogs and anything related to Japanese culture.
OP Gazette Review

Oldie but a Goodie - LV for Dolls - I see some familiar faces!

This was shared on social media and it's one I hadn't seen before - so I assume many of you haven't either - so enjoy!

Fashion dolls have been a central inspiration for Fabrizio Viti, Louis Vuitton's shoe style director. They stimulate his imagination just as art, photography and old movies. He has been collecting dolls since he was three years old and as a result, today he has a collection with around 500 pieces.
A brand of rich history and infinite creativity


The Value of Integrity - Tips From One Artist to Another

by Tracy Promber
Facebook Group
JPopDolls


With so many new, and talented artists coming out, I thought I would pass along some useful tips that were once offered to me when i entered the world of dolls. Maybe this will be helpful to some, maybe not. You can love it or leave it. It's up to you, but it's worked for me.

Be an ORIGINAL. With copyright and recasting issues rearing its ugly head more and more, don't be the person who gets accused of copying another artists work. That is a big unwritten no-no. While there is only so many ways you can re-invent the wheel, don't blatantly "emulate" another's work for resale. It's just flat out wrong.

No, it's not flattering to see something that took you a very long time to design, and put together, remade by someone else a week after you put your work out for the world to see. Be it sculpting, painting, sewing, etc, things inevitably can end up similar to someone else's work but, please, put your own spin on things. Make your work unique to you. Be an individual who shines on their own. I promise you, you will be admired that much more for it, plus it just feels good being able to create something that came from your heart. Not to mention that you may find yourself infringing on copyright, which can carry some stiff penalties.  And on that note, get your work registered with the copyright office too.

Be SUPPORTIVE. I am very fortunate to have a close group of friends in the doll world. They are a second family to me. We always support each other, whether it is personal or work related, I know without a doubt they will be there. Being able to run ideas past each other, or gather input on current works in progress is fantastic! It's just nice to share with them, and have that sounding board of feedback when needed whether it's good or bad. We all in this industry should support new artists and help guide them to be great. There is so much talent out there that should be nurtured instead of put down out of jealousy.

Dedication. The doll world is such a large and diverse area. There is a lot of room to spread your creative wings so to speak. Don't be afraid to try new things. Put your self out there. Challenge yourself with new projects. Most importantly, don't give up! Stay focused on your goals. Sometimes walking away from a tough project for a few days does the trick for me.  Especially when starting again with fresh eyes. If at first you don't succeed, try it another way. Some of my best creations were trial and error over and over, until I got it right. I've also had many a project make its way into the trash bin too. Don't get frustrated. We all have "those" projects. Just don't quit.

Stay humble and be thankful for the opportunities that come your way. Don't complain. Especially online. If things don't go your way, try again. Your day will come. People get turned off by excessive whining. We all have our own struggles, and sooner or later they always work out.  Be conscious of what you post online.  What is aggravating today and led you to a big Facebook ranting, will probably not seem like that big of a deal tomorrow, making you regret having posted it in the first place. The doll world is not the place to try to gain a sale out of sympathy or anger. If people like what you create, they will seek it. Don't guilt people into buying your stuff.

Being recognized for your accomplishments. Again, be humble and thankful. I've been fortunate enough to win numerous awards for my work. The awards that mean the most to me are the ones that my customers and peers voted towards. It is very gratifying to know that my work has touched people the way the Iintended it to. If it gives someone joy, it's all worth it to me. This is why I do it. Having the ability to create is definitely a blessing, and I am thankful for it every day.  Having been given a GENUINE award is a phenomenal feeling. Always remember this is a business. One award does not a master make though. Keep up the good work. Keep building and honing your skill. It all will pay off in the end.


Integrity is really everything, and it's an easy thing to have and maintain. Just remember:

Don't get caught up in drama.
Stay focused on your originality.
Keep your head screwed on straight.
Keep your moral compass in check. 
Stay honest and humble.
Don't be afraid to explore new ideas.
Don't step on other artists toes
Do ask for help when you need it.

The doll world should be a fun and exciting place. Let's all do our part to keep it that way

This is all advice that has been gathered and taken to heart over the years. No one is perfect or exempt from screwing up. We all do it. Everyone is expected to make mistakes here and there. That's how we learn right?

Collectible, OOAK, or Artist Dolls - oh my! Award Confusion Abounds

I have been looking at the Public Choice awards/Dolls Awards of Excellence Awards that DOLLS magazine does.  I have to admit this confuses the heck out of me. It actually always has but when I was working for them (Jones Publishing) I didn't want to admit I was a complete idiot when it came to the wide world of dolls. 

But, now I am.

For the awards, there are Collectible Doll categories, Artist Doll categories and OOAK doll categories. (There are also faceup, fashion, baby dolls and reborns.) 

The Artist dolls are all ball jointed dolls, I am guessing they are all one-offs of various existing/upcoming dolls done by the artist, right? That is what it looks like. That one is fairly easy.

The OOAK category is where it gets really confusing. dolls are all over the board in that category. The OOAK Fantasy Themed dolls are all figures. The OOAK Less than $1250 and Over $1250 are all figures except for one bjd and a baby doll. Were those mistaken placements? I guess not, since one (or more) was an Award of Excellence winner in that category.
(note - I'm not discounting the winners, stay with me here...)

Looking at the entries, some of the Artist Dolls are also OOAK so I'm not sure what the distinction is between an artist doll and a OOAK.

THEN, if it's not confusing enough, there is the Collectible Doll categories. Okay wait...aren't they all collectible?  

It's kind of all over the board, some of them are OOAK and some were pre-orders...and one is a statue. And wouldn't most of these fit into the other categories, or vice versa, so why the different category? And what is the difference between an Artist doll and a Collectible doll? 

AAAAGGGGHHHH!!!!!!!

Seriously. Do you see my conundrum? How do you even judge this? 

I always thought what classified something as a doll was that it was poseable in some way. The head turns, the arms move, etc. I understand many dolls are mainly for display, but they are still meant to be interactive in some fashion.

Then there are figures. We have collected quite a few of them. A 'figure/figurine/statue' is created in a particular pose and, many times, affixed to a base. It is not meant to be played with, modified, or even redressed. Really, it's only purpose is to be looked at.  

Then - you come to art dolls - which, apparently, which don't have to conform to a damn thing, which is where a lot of the confusion all comes from, Is it a doll or a figure? WTF?!?! And why does it get to be whatever the hell it wants? 

Confused yet? 

Shouldn't there just be a figure/art doll category? Because, really, it's a nightmare to even try to judge this. How do you compare an engineered, functional bjd next to a filmmaker Santa figure? Or a Don Quijote figure with a baby doll. Was the baby sculpted? or from a kit? Because that would make a big difference, right? Do you get what I'm saying? 

Now, don't get me wrong, I greatly appreciate the talent and skill it takes to create all of these, and they are all wonderful. That part is not up for debate. I'm only bringing up the category choices because it's confusing as hell and I wonder if it is as confusing to everyone else.

With all that being said - I highly encourage everyone to go check it all out and cast your vote. Support the artists that work so hard to create the treasures we love. You'll find all the info in the latest issue of DOLLS mag and Haute Doll mag - they were both the same issue this time.

Leave your thoughts, I am genuinely interested. 

EXCLUSIVE Tutorial by UNNIEdolls

UNNIEdolls gives us the first look at her newest tutorial. An adorable off shoulder blouse with easy to follow directions. ENJOY!

I created this pattern maybe a year ago. Many of you have been interested how I make the off shoulder blouses for my dolls. So, here is a tutorial, where I show you the whole process. If you make a blouse by using my pattern, please share with me on facebook, instagram, flickr, deviantart by using this hashtag #sewingwithunnie

HUNGARIAN SUBTITLE is available!

if you have any questions, please ask!:)

♥ Webpage/blog/shop: http://unniedolls.com
♥ Etsy Shop: http://unniedolls.etsy.com

My social sites:
♥ Instagram: https://www.instagram.com/unniedolls
♥ Google+: https://plus.google.com/+unniedolls1
♥ VK: http://vk.com/unniedolls

♥ Facebook: http://www.facebook.com/UNNiEDOLLS
♥ Tumblr: http://unniedolls.tumblr.com
 

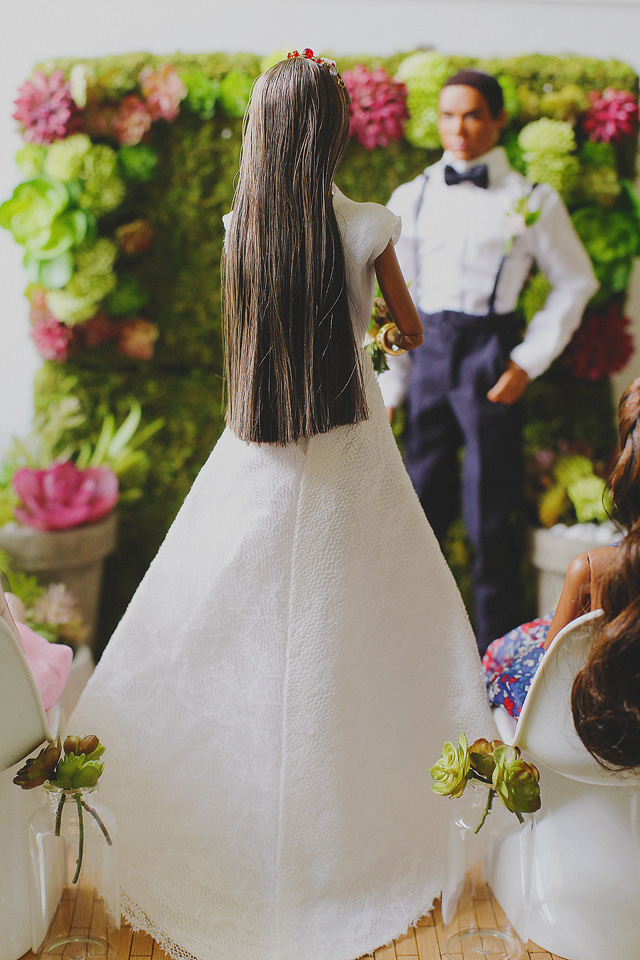
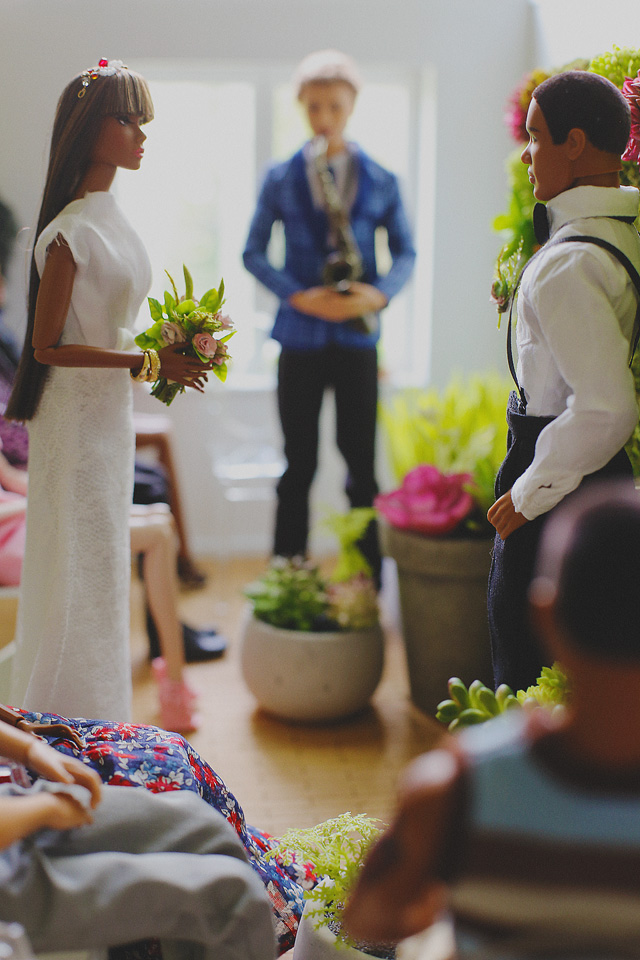
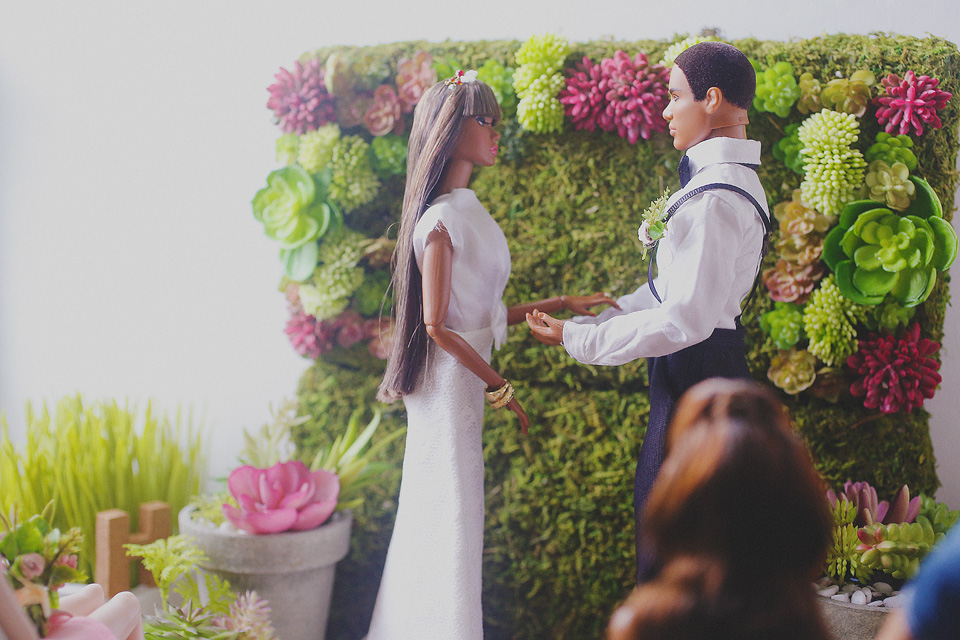
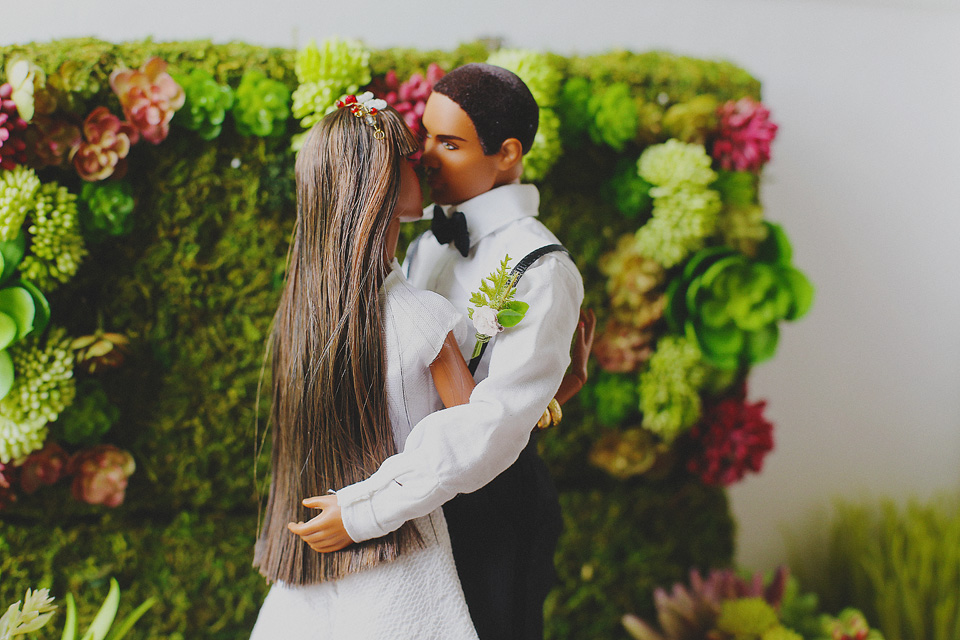
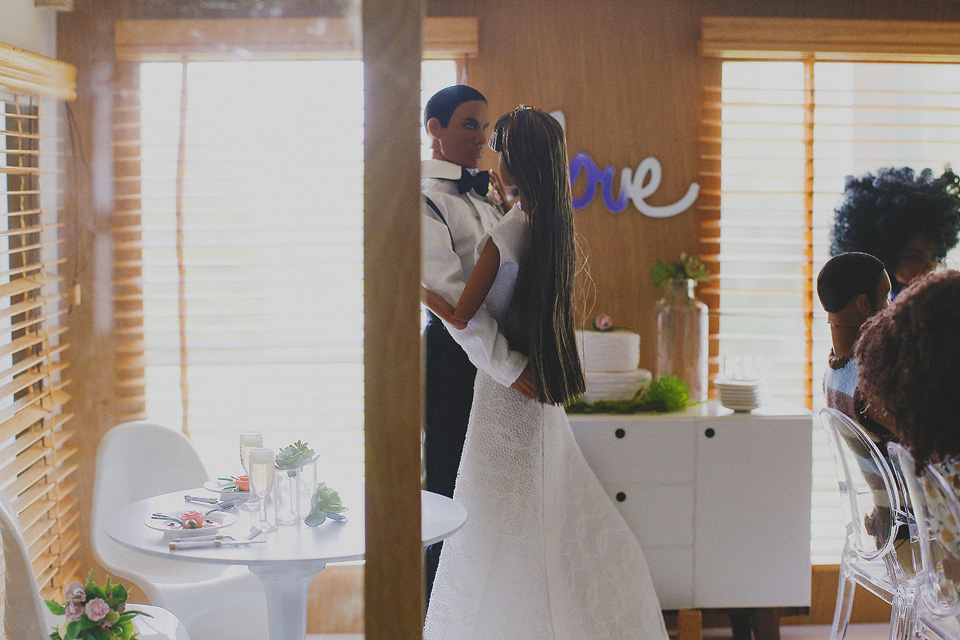
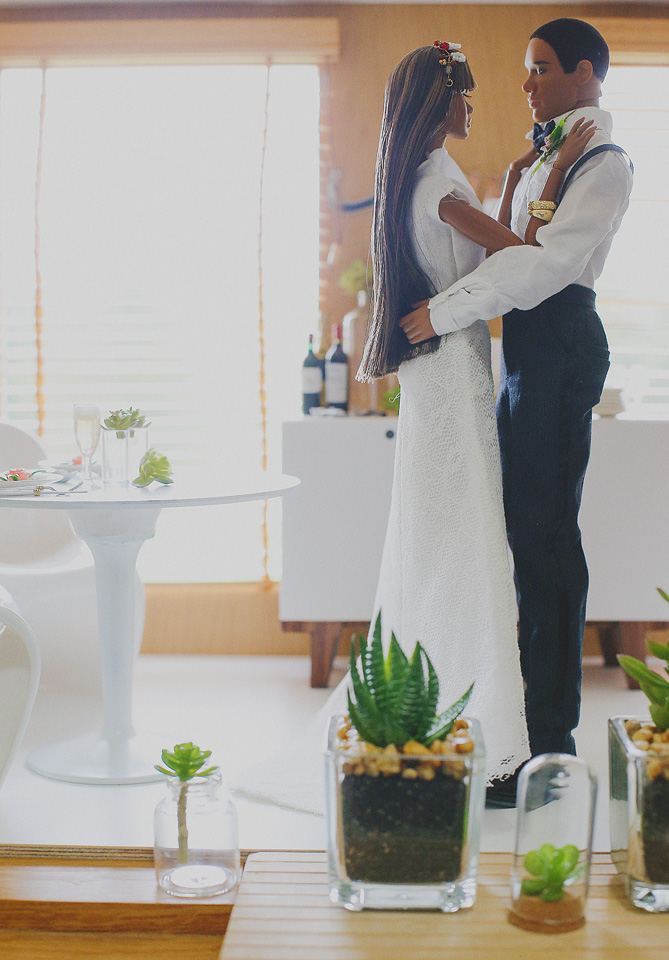
This wedding series is so good, you will forget they are dolls

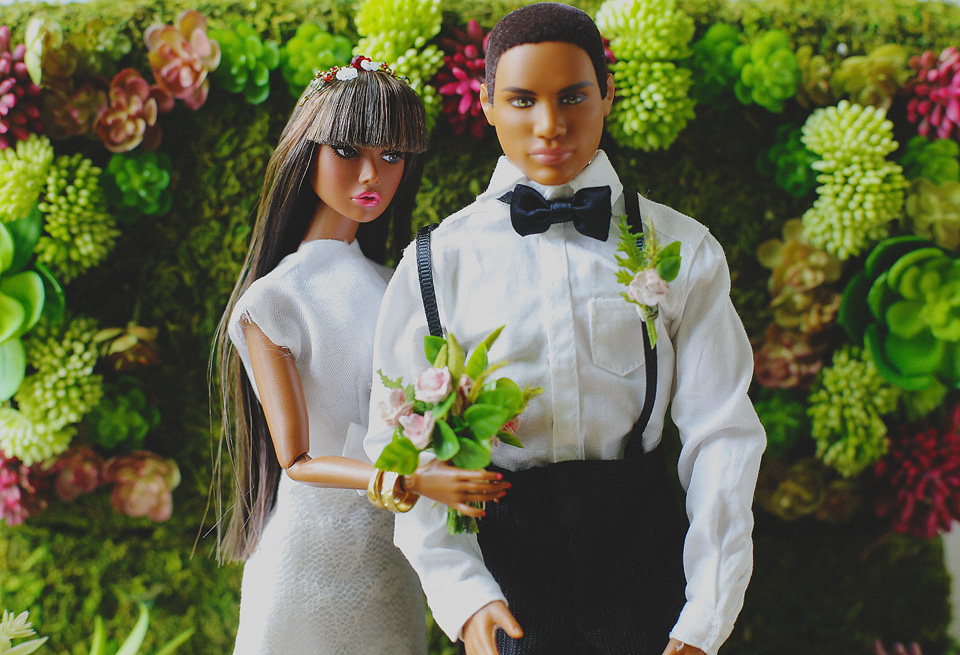
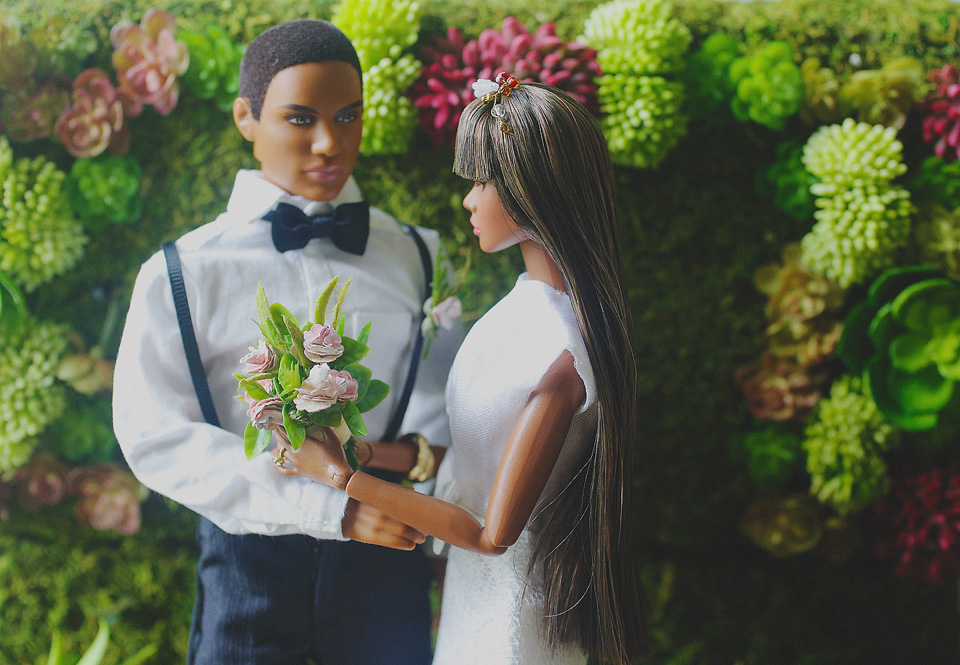
Nesha Kaye produced one of the finest photo series I've seen portraying a wedding. From the engagement photos all the way to the reception - it was impeccable. 

Her attention to detail is second to none, as many of you know. (Nesha has developed quite the following on her Instagram and Flickr) I just couldn't resist asking her about it and bringing you a sample of some of the shots. 

S: Ok, I just HAVE to know what inspired this?

N: Last holiday season, I decided to do a series of romantic, photo stories for a few of my dolls on Instagram.  The climax to the series of stories, were my favorite doll couple-Harmony and Jackson getting engaged on Christmas Eve. To be honest I thought the story would be finished but I kept being asked about the wedding so after much back and forth, I caved in and set the date for May 15, 2016 (my 18
th wedding anniversary).

S: I've seen many people do the whole wedding series before, but never as clean and real as yours. How did you decide on the theme?

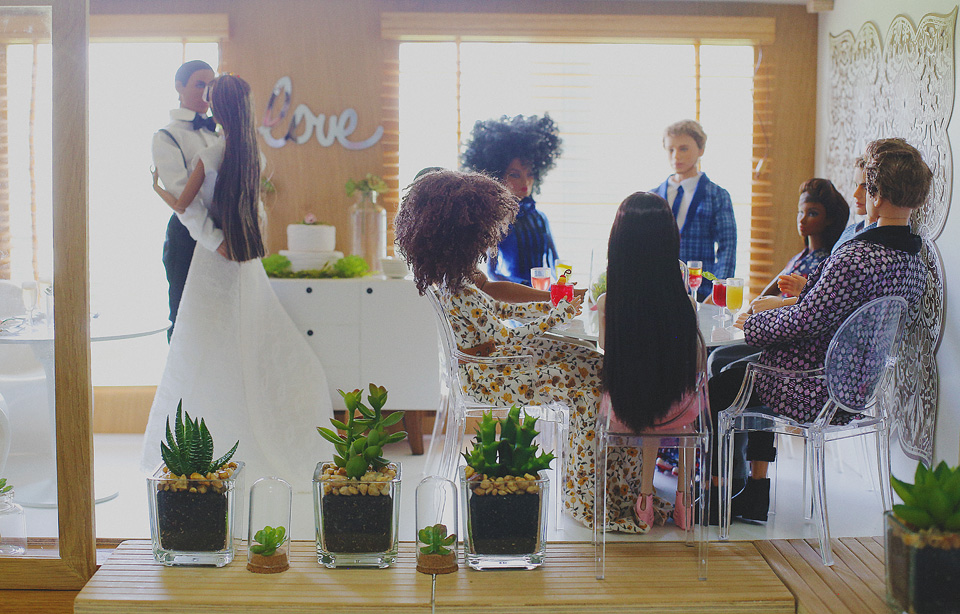
N: I wanted the wedding to be as realistic as possible so I started with engagement photos, followed by the bride and groom getting dressed, and formal wedding portraits. The wedding itself was by far the hardest part but after searching through Pinterest for inspiration and consulting back and forth with my Mom, I was able to create my version of an Idyllic Floral Wedding.

S: Where did you find all the accessories and decorations?

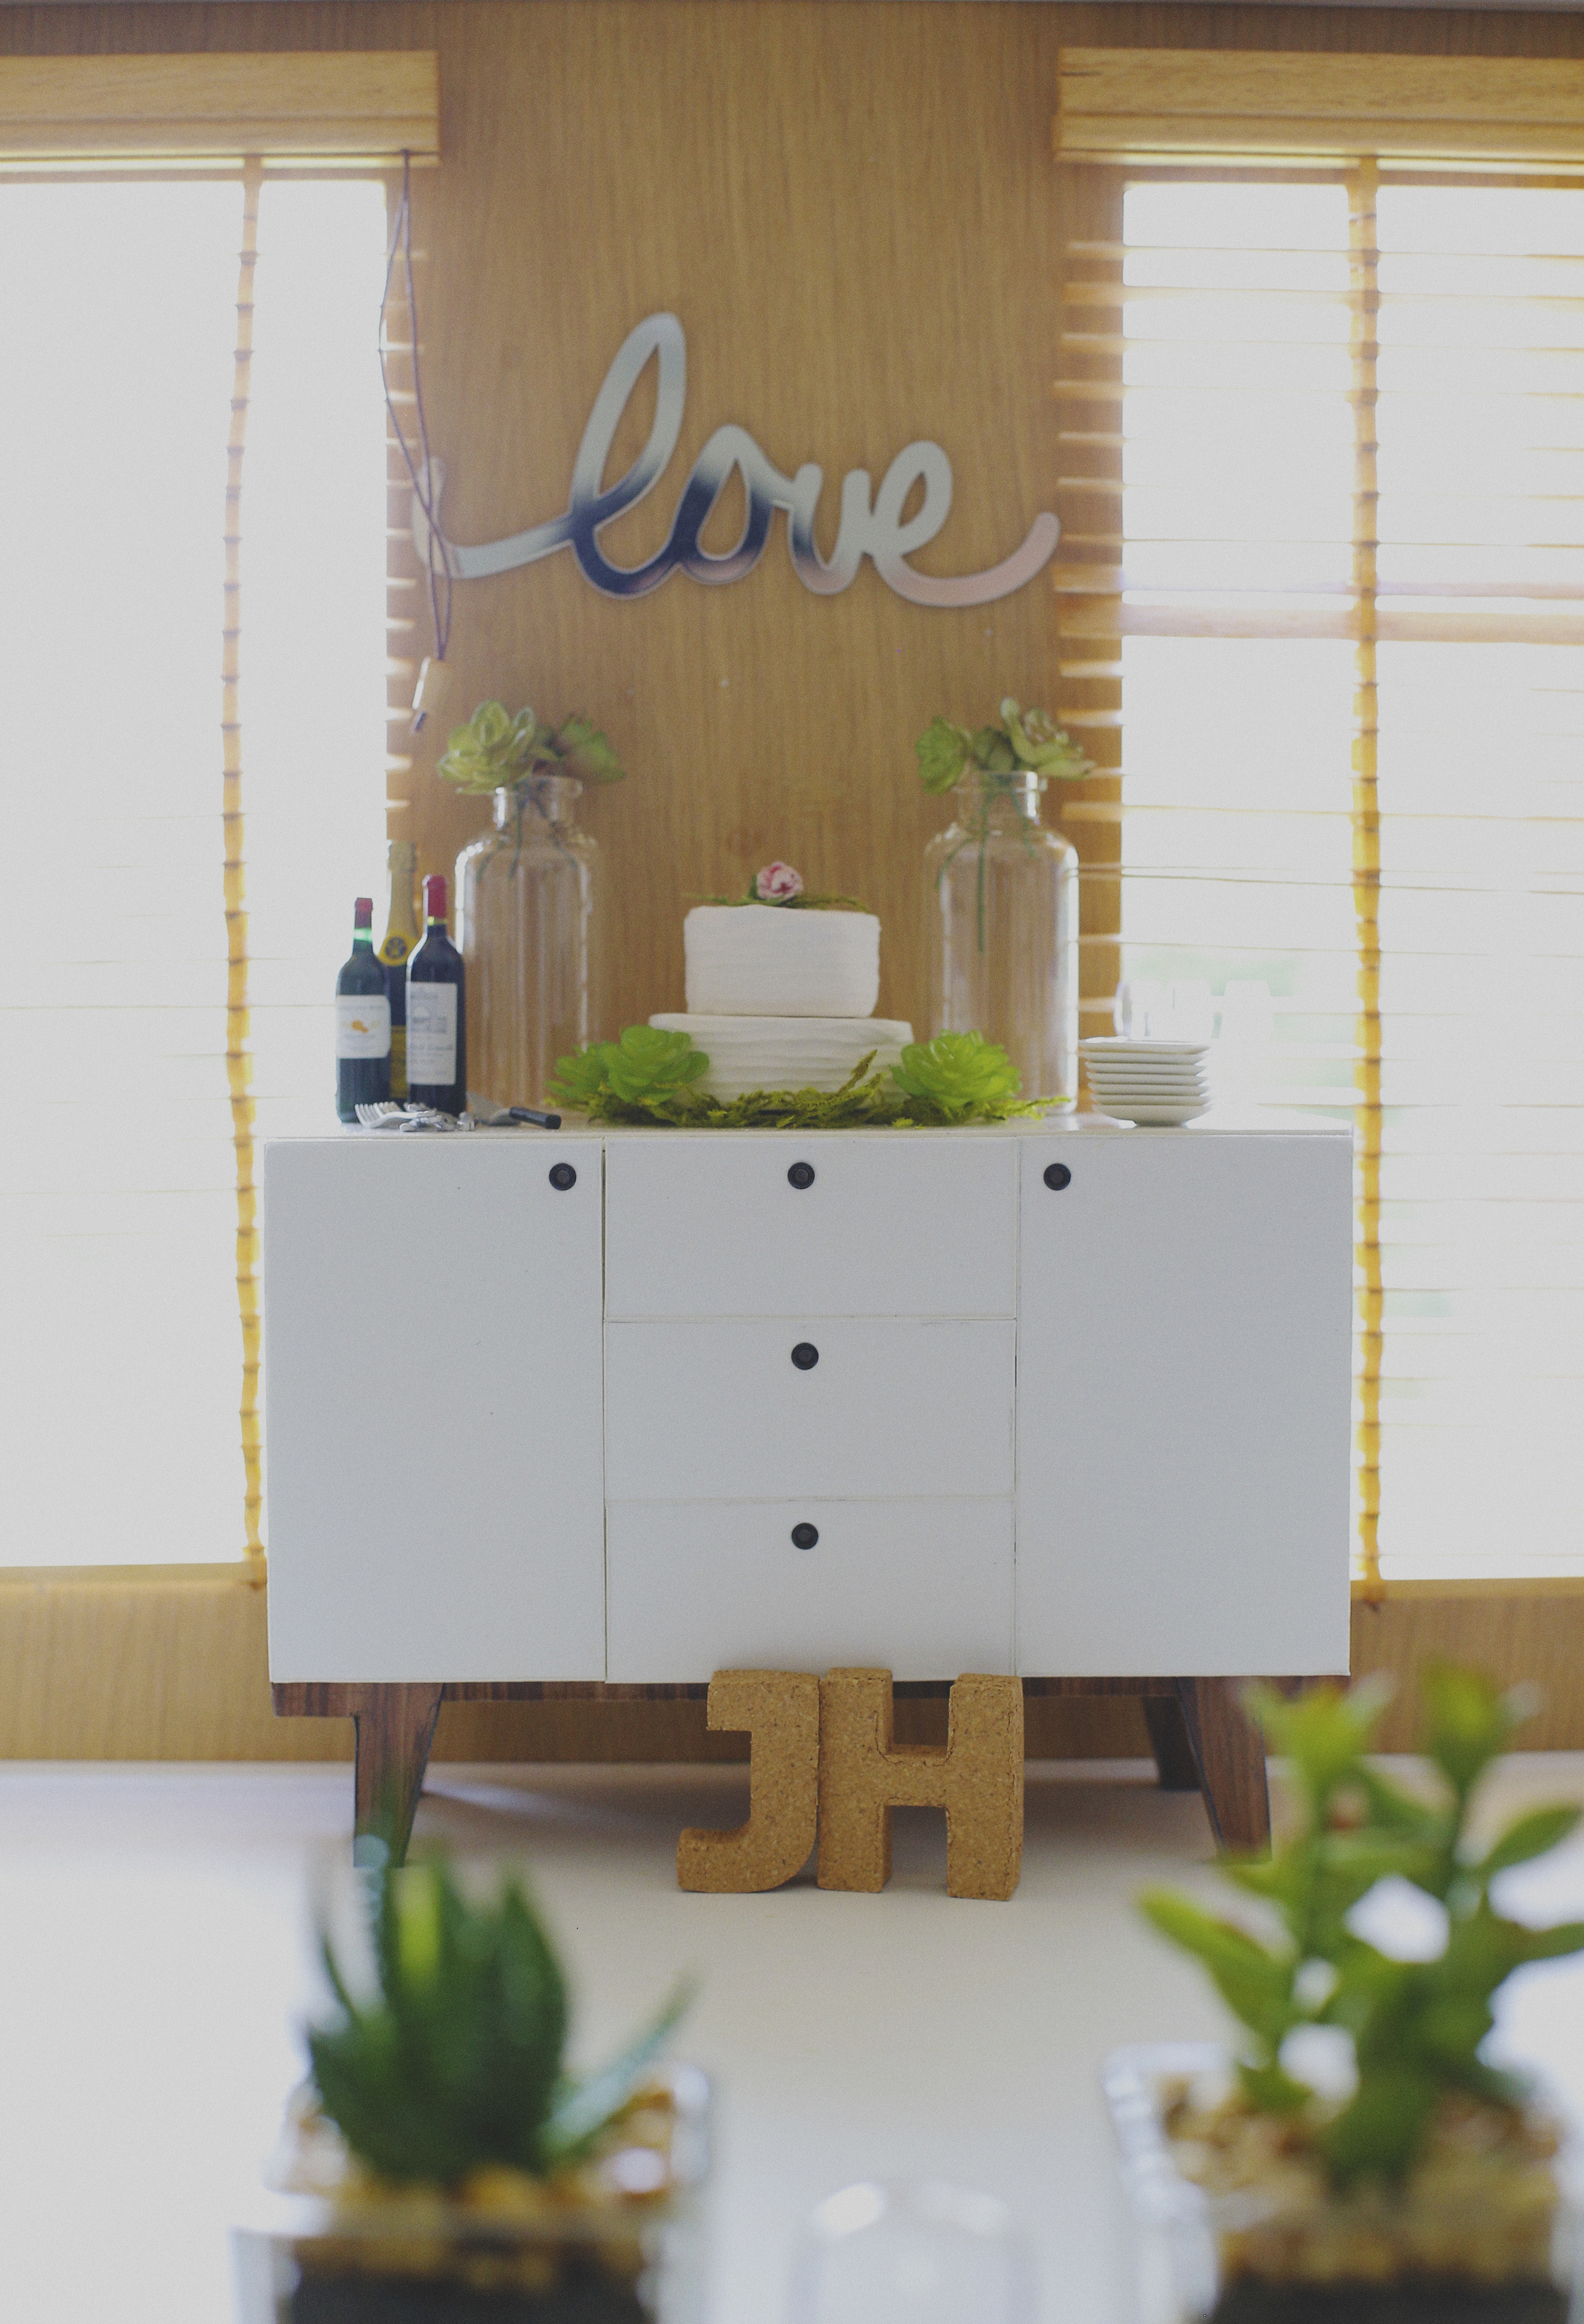
N: Amy Sprouse of “TinyRibbonThings” on Etsy created the bouquet, boutonniere, and wedding cake from a Pinterest design and I made or sourced all the floral arrangements and decorations. For the reception I wanted simple elegance and a softer, more romantic feel so I kept all the décor and furniture to a minimum. To keep it fun and light, I used quotes for each image. Everything was shot in 1:6 scale, using various room boxes and furnishings from my personal collection.

S: This was a ton of work! How many images is the complete project and is there a chance you'll do it again?

N: The pre-wedding, wedding, formal portraits and reception took me 6 weeks to create and 80 images to bring to life.  I’m really happy with the result and look forward to creating another wedding sometime next year.

S: Nesha, thanks so much for sharing your work with STAND. I can't wait to see what you do next!

You can see some of her work featured in Volume 2 of the STAND Lookbook coming July 5th. Until then, see the entire shoot and all of her work on her social media sites:

Facebook
Flickr
Instagram

Lashing Out Loud - Replacing those pesky eyelashes the easy way

Laurie Lenz, one of the jaw dropping repaint talents in the group The Repaint Society, has provided us with us awesome tutorial on eyelashes. 

I know that the majority of my ladies get crushed or missing eyelashes at one point or another - the downside to actually playing with my toys. Thankfully, it's not that hard to replace them and here's how:

What you need:

*Eyelashes...preferably a strip without glue on it. (Dollmore, or Volks sell them.)

*Aleene's Quik Dry Tacky Glue
(I recommend the Quik Dry, or you'll be waiting for FOREVER.)
(Never EVER EVER use Crazy Glue! It's from the devil.)

*Angled tweezers

*Angled scissors (that little piece of yarn is there to warn my family--"touch & die.")

*Toothpicks

*Damp Cotton Swab (not pictured.)


Hold your eyelash strip up to the doll's eye to get a rough estimate of how much you'll need.

Cut the section off the strip and gently roll your lash around a pencil to give it some curl.

Take the Quik Dry Tacky Glue and apply it to a toothpick.

(This is a water based glue.  If you ever want to remove the lashes, just wet a Qtip and dab on the lashes and they will come off. Never use any glue but a water based glue. )

Dot dot dot the glue from her tear duct to the center of her eye. (Do not go past the center.)

Apply tacky glue to half of the eyelash.

See that Q-tip? I always have a damp one there just in case I get some glue on my doll

so I can quickly wipe it off.

Allow to sit for a few seconds and then with your angled tweezers, place the lash against the eyelid -glue to glue.

With a clean toothpick, gently press the lash into place.

Go make a sandwich, waste time on Facebook, place a bid on a doll, or move your wash to the dryer, and allow the glue to dry.

Once the glue has set, press the eyelash down, so you can judge where it needs to end.

Pull the lash up gently, and cut to fit.

Pull the lash back and run a bead of glue on her upper lid, 

and run a bead of glue on the back of her eyelash.

With the clean toothpick, press down and position.

Allow the spider lady's eyes to dry.

Once they are dry, take your angled scissors and trim the lashes.

From ordinary to extraordinary. Love those lashes, Daphne!
Special thanks to Laurie Lenz for this tutorial. She the original below and check out all her other amazing work - seriously, check it out! 

http://etsylaurielenzangels.blogspot.com/2014/07/lashing-out-eyelash-tutorial.html

Modifying Heads For Hybrid Dolls - An Easy Solution

writer//Amy Namsiriwan

Iplehouse makes really beautiful dolls, but if you're like me and have need specific physiques for specific dolls, then you may want to hybrid their heads onto other bodies. However, Iplehouse dolls have large necks compared to the vast majority of bjds out there so there are very few, if any, bodies out there that that Iplehouse heads fit on without some sort of modification.

This is actually quite easy to do! Of course the method works for other hybridizations where the head hole is bigger than the neck.

You just need some clay, plastic wrap and an xacto knife or some other similar tool for shaping.

First cut 2 pieces of plastic wrap, one to cover the neck stump, one to fit in the head's neck hole:

Then take the clay, ball it up and then mold it into the neck hole:

Now take the head with the clay in it and press it down on the plastic covered neck until the head looks like it's sitting the way you want it to. At this point, the clay will have squished out some and you may need to trim around the edges:

You'll see inside the head, when you pressed the clay, that the hole for the S-hook leaves a shape in the the piece:

That shape serves as a guide to show you where you need to cut the hole for the S-hook. Make sure to leave ample room. Carving the hole too big is generally not an issue, but if you make it too small then you'll have to carve hard clay out if your S-hook doesn't fit:

While cutting the hole out, the piece may have deformed some, so fit the piece in between the head and neck again to make sure that the shape is right. At this point you can smooth it out as much as you wish as well. The only part that will be showing is the lip of the underside of the piece, so it's not really necessary to make it all that pretty, but if you're a real stickler for details, even ones that can't be seen, knock yourself out!

Now you just let the clay dry, or boil or bake the clay, depending on what kind of clay you used. Sand or finish it any way you like if you wish. You can either use the clay piece itself, or if you like, you could get a small kit and cast the piece in resin. The clay seems to work just fine though. You can paint the lip that shows to match the doll's skin if you wish, but I find that mine isn't really seen much in pictures.

Even hardened clay is usually somewhat soft and still carvable with carving tools, so even if you find that your new piece needs some adjusting after it you thought it was finished, it can still be changed. Either carved out, or you could use a hot glue gun to add on, which I like to do since I trust the hot glue as sueding against the resin. Clay seems to hold pretty well against resin, but i still like glue.

The end!

Hope this helps some people!

Sorry for the rough example, but I'm doing this quickly and I'm not actually making a new piece for use since I already have one so I'm not going to take the time to make a fully finished smoothed out piece.

For other tutorials, visit Dirili's homepage: HERE 

Turn your boring pieces of furniture into vintage shabby chic awesome

I simply adore anything that has character, so when I saw this tutorial by Unniedolls I knew I had to share it! 

Not only is it super easy but it looks fantastic. Think of all those bare wood items at Michaels that you could spruce up - oh, and don't forget to download their app too to save extra $$$ ;)
Be sure to check out Unniedolls here:
♥ Webpage/blog: http://unniedolls.com
♥ Etsy Shop: http://unniedolls.etsy.com

Making a custom wig - Not as hard as I imagined

I found this fantastic tutorial today and was mesmerized watching her. I'm sharing part 2 which is about placing the hair on the wig, I think making the cap is probably fairly simple and I'll leave it to you to go to her site and watch that one.  I really just wanted you all to see that it isn't as hard as you might think to make your own.

Of course, I probably never will as I'd prefer to pay someone else to do it, lol...BUT if I got crafty (though my crafting skills are really limited) I actually think I could pull this off. So who knows, maybe I'll get industrious one day and give it a shot ;)
Give this a watch and check out Unniedolls website for more. She does some fantastic mods and repaints.

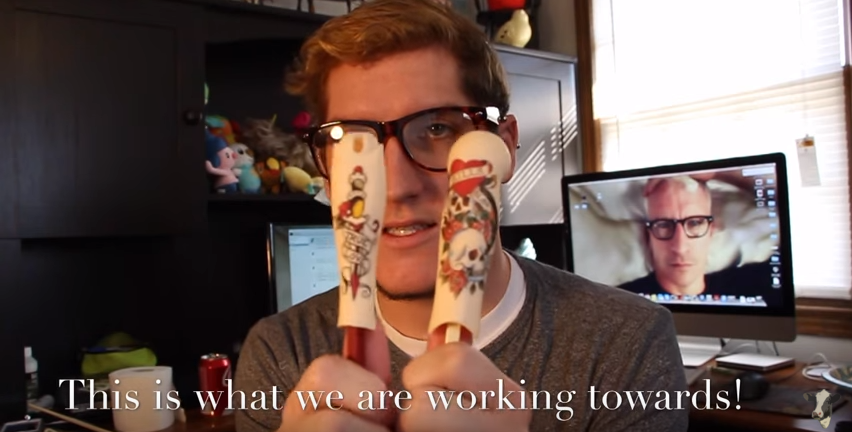
Temporary Tattoos

Oh, you guys know I love tattoos, or maybe you don't, but you do now!

Can you believe I don't own a doll with any tattoos though. It's something I really need to fix and I found this tutorial to help me do just that! 

Who knew it would be that easy!


Matchbook nightstand

I stumbled upon this one and thought it was a fantastic idea and fairly simple to follow along.  I was finally able to trace it back to the original poster, who does some fantastic crafts, so be sure to check her out. (I'm also completely jealous of her nails, though I wouldn't be able to function - they are beautiful)